Learn How to Grow Fresh Herbs Indoors In Minutes: A Lazy Guide
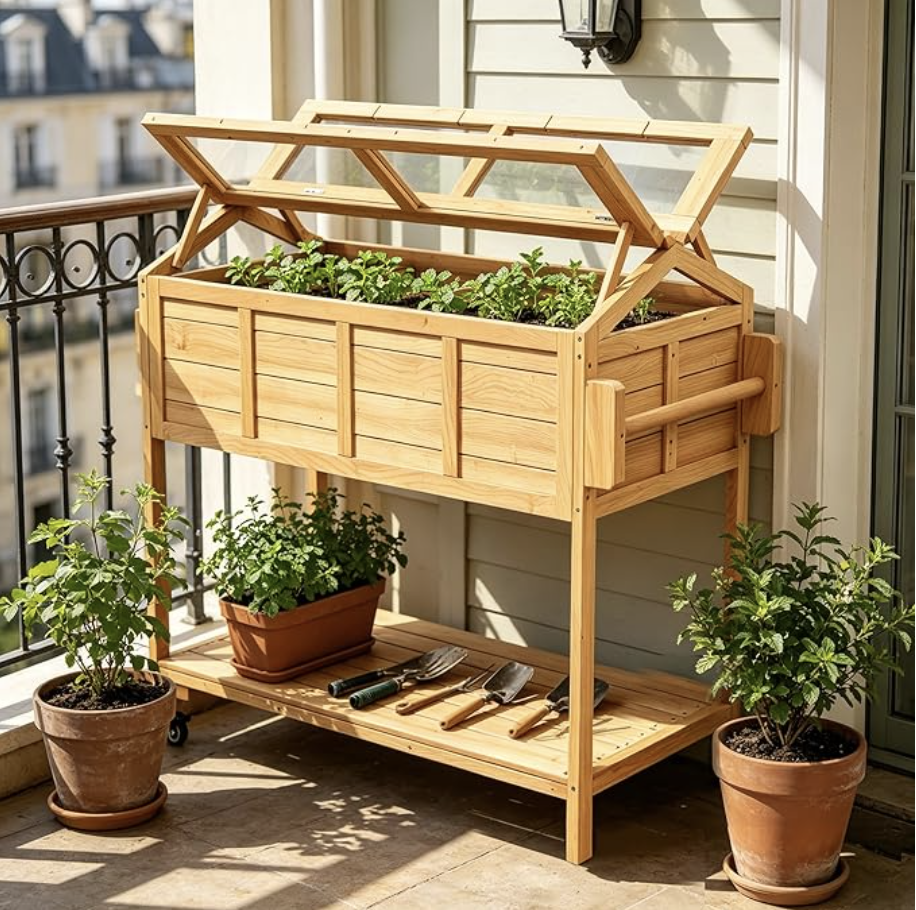
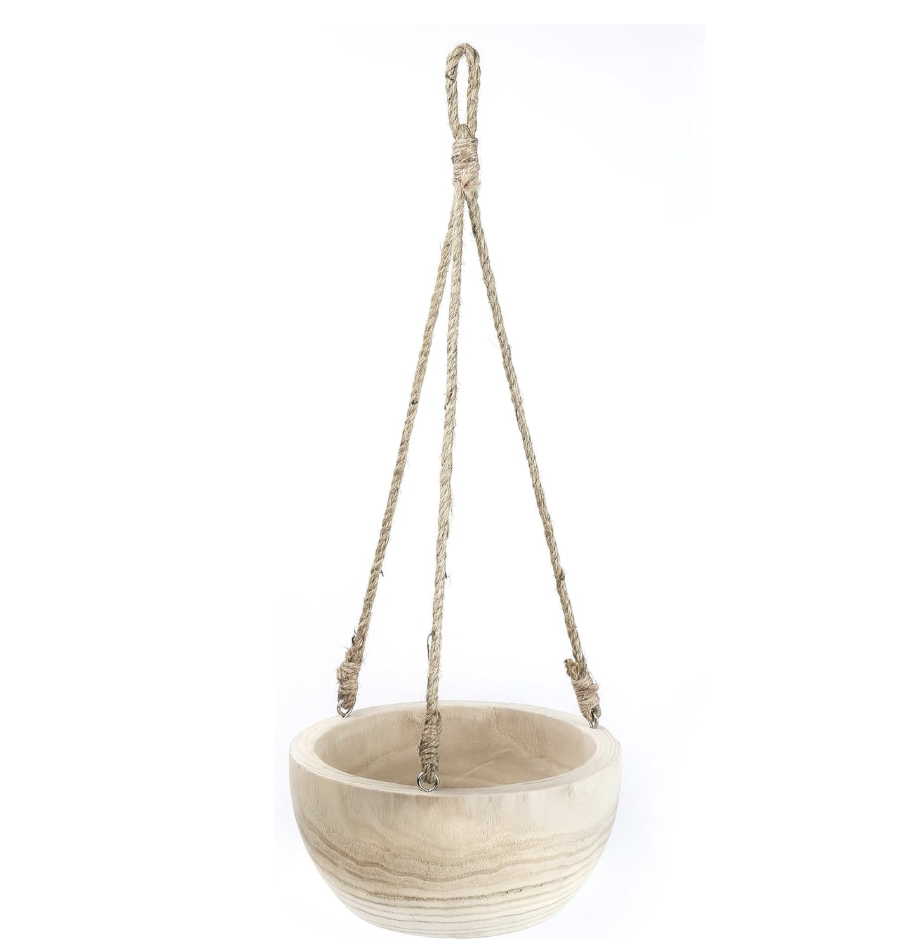
Learn how to grow fresh herbs indoors in minutes. Yes, everything you need to know to start growing asap, within minutes (once you have the materials) is in this lazy guide. We pulled out all the stops. Not everyone has time or money or space to grow a picture perfect outdoor herb garden in a beautiful raised bed. But that surely doesn’t mean growing fresh herbs is out of reach for you. You can grow herbs. It’s pretty simple, but I’m not saying you can grow every type of herb there is, but you can grow several basic varieties with the right tools and some indoor planter pots that lift your mood every single time you see them. Specifically, I’m swooning over this chrome planter pot that’s under $20 and this dark-chocolate colored woven hanging planter pot. Today, right from your kitchen counter.
How to Grow Fresh Herbs Indoors
Of course you can grow herbs outdoors, but this is a lazy foodie’s Herb Garden. We all don’t have time or inclination to become a professional gardener. That’s what makes it lazy, we’re conserving your time and giving you all the need-to-know best info. Plus, if you’re “lazy”, you probably want your herbs right where you use them, at arms reach in your kitchen. Pick the perfect shelf or place on the counter for a few potted herbs. If your kitchen isn’t very bright, you’ll need to get a simple grow light.
The Secret to Lazy Growing Herbs: Forget the Seeds
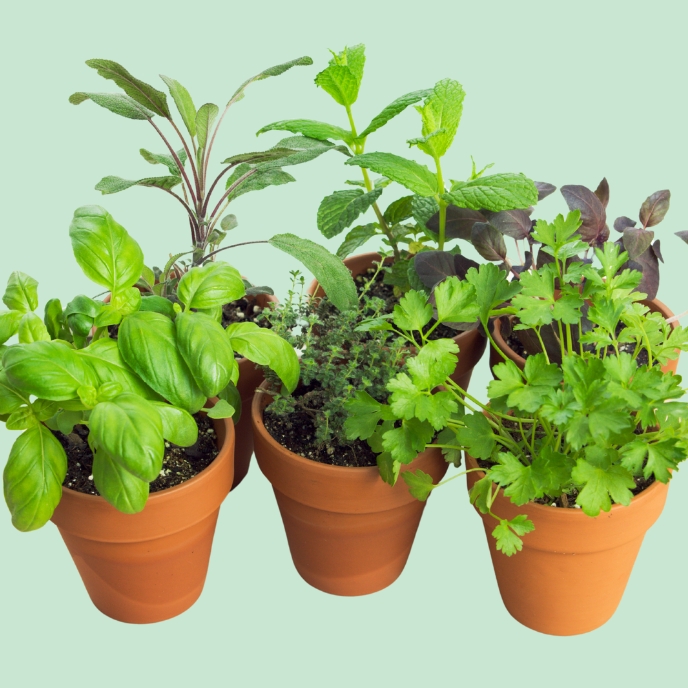
The secret to herb growing success is all about how you get started. The lazy foodie should start with “transplants.” Transplants are herbs that are already growing that you buy at a store. These young plants give you a head start, allowing you to enjoy fresh herbs so much sooner. Starting with herbs that are already growing is going to give you instant success. Depending on the size of the transplant, you might be able to start using your herbs at once.
Why can’t you grow your herbs from seed? You can, but this is all about the Lazy Foodie’s Guide to Growing Fresh Herbs and planting from seed and waiting months to use your herbs is NOT lazy.
But don’t worry– if you love growing from seed but are still lazy, scroll down to the section all about growing herbs as microgreens.
Where To Shop For Transplants
Here are some common places where you can find herb transplant starts:
- Local Nurseries and Garden Centers
Local nurseries and garden centers are excellent places to find a wide variety of herb transplant starts. Choose a mom-n-pop garden center over a chain because you know that mom-n-pop store is only carrying plants that work well in your climate and region. - Farmers’ Markets
Farmers’ markets are another fantastic option for finding herb transplant starts. Many local farmers and gardeners sell their plants at weekly farmers markets, these plants are often organically grown. Buying from farmers’ markets supports local agriculture and allows you to ask growers directly about their cultivation practices. **Pro tip from someone who worked at farmer’s markets for years— do not buy any edible plants that the farmer places on the ground around the edge of their booth. I can’t tell you how many times I’ve seen dogs urinate on plants placed on the ground. - Grocery Stores
Some grocery stores, especially those with a focus on organic and local produce, carry herb transplant starts. Look for them in the produce section or near the floral department. These plants are usually ready to be transplanted into your garden or containers at home. - Home Improvement Stores
Large home improvement stores like Home Depot and Lowe’s often have garden centers that stock herb transplant starts. These stores typically offer a good selection of common herbs and gardening supplies, making it convenient to pick up everything you need in one trip. - Online
Yes, you can buy transplants from online retailers. Is it ideal, maybe not. One of my friends just bought basil and pepper plants from amazon. They looked strong and healthy. I am sure there are just as many stories of shipping failures from buying plants online. Just be sure to buy slightly older herbs. Older plants with stronger roots will me more resilient to the stress of shipping. Buy the same links my friend just received from Amazon: Basil, German Thyme, Garden Sage. Not an Amazon person? You can buy the same plants online from Home Depot: Garden Sage, Chives, German Thyme.
How To Choose Healthy Herbs
If you are shopping for herbs in-person, don’t just grab the first plant you see. Inspection is key to find strong and healthy plants. The last thing you want is to get home any find out the basil plant you selected is full of aphids, or the parsley has already bolted (meaning it has already made flowers and will shortly die).

Look for Vibrant and Firm Herb Transplants
If you are brand new to growing herbs, you might not know what to look for in a transplant. Start with vitality. If the herbs look droopy with wilted leaves, it is probably already struggling. Skip it.
Inspect for Insects
If the herbs have any insects besides lady bugs, best to pick another transplant. You will need to look closely because some insects are hard to see. Look under each leaf for anything that looks like it does not belong. If there are gnats buzzing around, those gnats have probably already laid eggs in the soil. Skip any herbs with gnats or small winged insects buzzing around.
Healthy Roots Check
If possible, gently ease the transplant herbs out of the container to get a good look at the roots. When plants are “root-bound” it might look that the white roots have grown so much that you can hardly see soil when you pop the plant out of the container. You might think there is hardly any soil and it is all roots. Skip that transplant. While you do want to see a network of strong healthy roots, you do want to see some soil between all the roots. You should be able to gently tease some roots out with your fingers.
Pick the Right Herbs Your Environment
A key to success is to pick the right herb. I’ll say it…steer clear of cilantro. I love cilantro, but I will only grow this herb as a microgreen. The mature plant is finicky. It bolts (starts flowering, soon to perish) as soon as the first heatwave of summer comes. Basil loves warm weather but struggles with cooler temps. Thyme and rosemary at little warriors and do pretty well in most indoor environments (with grow lights if low light). I’ve had success with parsley, knowing it will last just a couple months. Marjoram and oregano are great choices too. Mint is hard to kill but can get spindly without enough light.
It may feel overwhelming. I’ve listed popular herbs that are easy to find online and in stores. First think about the average temperature for the next few months in the place you will keep the plant. Just because it might be 95° degrees outside, doesn’t mean your kitchen is going to be 95° degrees. In the summer, my kitchen ranges from 67°-88° degrees, in the winter it is 55°-73°.
Now that you know the temperature for the next couple of months, scan the list below to find a few herb varieties that thrive in that temperature range. For me in the summer, I’d do well with basil, rosemary, and mint.
Basil
Basil thrives in warm temperatures between 70°–85°F (21–29°C), needs at least six hours of direct sunlight daily, and prefers moderate humidity to prevent dryness. Use a bright grow light if you don’t have a very sunny window and grow near the kitchen sink for more humidity.
Oregano and Marjoram
Oregano and marjoram have similar needs. Both thrive in a moderate to warm environment between 65–75°F (18–24°C), requires bright sunlight, and tolerates dry conditions well.
Thyme
Thyme enjoys slightly cooler conditions around 60–70°F (15–21°C), requires full sun but can tolerate partial shade, and adapts well to lower humidity levels. When it is warm out, keep this plant away from heat sources (i.e. the oven and toaster), move it closer to heat sources when temps are very cool.
Rosemary
Rosemary loves warmth, ideally above 65°F (18–24°C), demands bright sunlight for most of the day, and prefers drier air to prevent mildew. Place this plant in a sunny window, away from the kitchen sink. Use a grow light to supplement light if you don’t have enough sun.
Parsley and Chervil
Parsley prefers temperatures between 60–70°F (15–21°C), grows well in partial shade or full sun, and likes moderate humidity. Chervil also thrives in cooler conditions around 55–70°F (13–21°C), prefers partial shade, and benefits from a slightly humid environment.
Mint and Spearmint
Mint grows best between 65–75°F (18–24°C), tolerates partial shade or indirect light, and flourishes in humid environments to keep its leaves lush. If you live in a dry environment, keep this plant close to the sink or dishwasher.
Dill
Dill prefers warmth from 60–75°F (15–24°C), requires full sun, and adapts to moderate humidity levels.
Sage
Sage does best in warmish conditions above 60–75°F (15–24°C), needs full sun, and prefers drier air.
Choosing the Right Soil for Your Indoor Herb Garden
When growing herbs indoors in pots, the right soil is key to their health and flavor. The herb transplant plant will come with some soil depending on the age of the transplant. Generally, the larger the transplant pot, the older the plant. If your transplant is young and in a very small container, you will need to re-pot that transplant right away into a larger pot with more soil. For that, you’ll need potting soil. Good potting soil.
The best type of soil for herbs is a well-draining, lightweight potting mix that’s rich in organic matter. Herbs like basil, thyme, and parsley thrive in soil that maintains moisture without becoming waterlogged, which can lead to root rot.
A potting mix containing ingredients like coconut coir or peat moss helps retain moisture, and perlite (those little white crumbly rocks) or vermiculite (tan shimmery light brown flakes) improves drainage. Good quality potting mixes come with a balanced nutrient profile to support growth, so look for a potting mix fortified with aged compost or organic fertilizer.
Using poor-quality soil, such as dirt from your yard, can harm your herbs. Yard soil often lacks nutrients and may become compacted in pots, impacting root growth and hindering water absorption. Worse, it can introduce pests like gnats or harmful microbes into your indoor garden, putting your plants at risk. If you can, spend a little more on a quality indoor potting mix. Here are a few links to soils I use: Fox Farm Indoor Potting Soil (amazon) , and Gardener’s Supply Company Organic Potting Soil Mix (amazon).
Choosing A Planter for Your Indoor Herb Garden
Choosing a planter/pot is the fun part! It is your chance to show your personality. There is a pot for every style. No matter what style pot you choose, look for one that has a 6-12 inch diameter at least 6 inches tall. Drainage is important. Some pots come with built in saucers where water accumulates after watering. Other planters, like self-watering planters/pots have drainage holes, but are self-contained so no water leaks out.
Have a Pot Without a Hole You Want To Use?
If you fall in love with a pot that has no drainage holes. No worries. Simply plant your herb in a regular plastic nursery pot that fits nicely within your preferred planter/pot. Upcycle something like a big yogurt container, just be sure to cut holes in the bottom and check to make sure water can drain out. A few slits in the sides can help too.
Self Watering Planters- A Smart Choice
Self-watering pots offer a convenient solution for growing indoor herbs. Usually, there is a basin beneath where the plant goes that holds water. The designs vary, but usually, your job is to add water to the reservoir and not the top. Some designs have a viewing window or gauge showing exactly how much water is left.
Their design ensures consistent moisture from below, promoting healthy root development and reducing the risk of underwatering or overwatering. The top of the soil tends to stay drier, which reduces the chance for gnats or other insects to move in. Consistent water can result in vigorous plant growth and a reliable supply of fresh herbs.
I recommend this low-tech automated watering method.
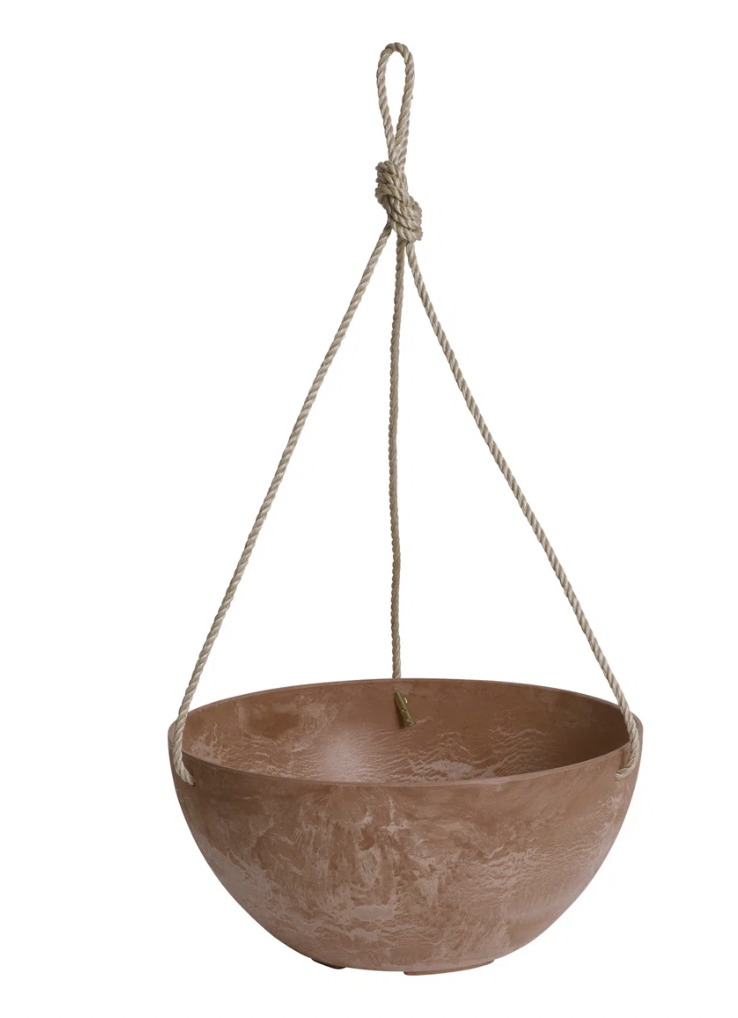
Hanging Planters
If you are like me, there is never enough counter space, even for lovely and utilitarian indoor herbs. If this is you, consider hanging planters for your herbs. The trick is to hang them within arm’s reach.
Smart Planter Pot– This whimsical pot is high tech with 7 different sensors to tell you exactly what to do to keep your plant alive and thriving. I would totally use this pot on my desk at work, or it could be a great gift for a kid.
Do You Need a Grow Light For Your Indoor Herb Garden?
If you want your herbs to last more than a couple of weeks, and you don’t have a big, bright window, then a grow light is a must for most herbs. Don’t be intimidated. Grow lights can be simple. I suggest looking for grow lights that attach to individual pots, so you when you move your herbs around, the grow light simply goes along to the new location. There are other simple clip-on grow lights that are set on a timer, so they don’t need to be on all night.
Here are some recommendations for grow lights:
- Dimmable, Full Spectrum, Timer, Base or Stake Option Amazon or Wayfair
- Clip On Pot Full Spectrum Grow Lights buy on Amazon or Home Depot
- Dimmable Full Spectrum Light Strips for growing on a Shelf on Amazon or Wayfair
- Plant Stand and Grow Light in one on Amazon or Wayfair–
When To Start Your Indoor Herb Garden
When growing indoors, if you have a grow light and you don’t let your home get too cold, you can grow herbs year round. However, there are some herbs that are more finicky about temperature. Basil grows best in warm weather, so grow this herb in the summer. Other herbs, like dill and parsley will struggle if your indoor environment is regularly in the upper 80s. When picking the varieties you’d like to grow, consult the list above for which plants to choose in each season.
Take care when you vacation. Your herbs may not make it through your vacation even with a self-watering pot and grow lights on timers if the temperature drops or gets crazy hot.
When & How To Water Your Potted Herbs
You’ve got your herbs, soil, and planters/pots (and possibly a grow light), time to talk about watering. Watering can be tricky.
The number one rule is not to let your herbs get soggy. Too much water will stress out your herbs and can cause root rot. Not good. Soggy soil also attracts gnats.
4 Rules to Follow To Prevent Soggy Soil:
- Use Quality Soil– review the section about choosing a good potting soil.
- Choose a Pot with Drainage Holes: If you are not growing in a self-watering planter, then make sure your pot has good drainage holes. Don’t worry if the gorgeous pot your love doesn’t have holes, because you can plant your herbs in a regular plastic pot with drainage holes first and nest it into the pretty no-holes pot.
- Check Moisture Levels Before Watering: Make sure the plant needs water before you water. The easiest way is to stick your finger in the soil. The first inch of soil might be dry, which is just fine. If the soil is dry an inch down, then your plant is ready for water. Don’t trust the finger-test? You can buy moisture meters that will tell you at a glance whether the plant needs water. If you want to really know what is happening with your plants, try this Wireless Soil Meter with an LCD screen telling you the moisture levels, light levels and temperature around two plants.
- For Self Watering Planters– A self-watering planter can cause a plant to become soggy. When you first start using your self watering pot, pay close attention during the first two weeks. If the plant get’s soggy, reduce the frequency of filling the water cavity. A self-watering pot does not need a constant supply of water in it’s reservoir. Add water to the reservoir when the plant needs it– When the plant is not moist an inch down using the finger test noted above, or using a moisture meter.
When and How to Fertilize Your Indoor Herbs
If you start with a good quality potting soil, there is no need to add soil additives when you first plant, but liquid fertilizer may a good idea depending on the variety of herbs want to grow. Fertilizer provides essential nutrients that plants need to grow, replenishing soil that might lack sufficient nourishment. It typically contains three primary nutrients: nitrogen (N) for leafy growth, phosphorus (P) for strong roots, and potassium (K) for overall plant health, each represented in the NPK ratio on fertilizer labels.
For indoor herbs, fertilizers come in different forms—liquid fertilizers, like fish emulsion or seaweed extract, provide immediate nutrients and are best used every few weeks. Slow-release organic fertilizers, such as blood meal or bone meal, gradually enrich the soil. Soil amendments, like worm castings and compost, improve soil structure and microbial activity.
Hydroponic growers use water-soluble nutrients, carefully balanced for efficient absorption but are designed for water-only growing, which we are not doing here. Choosing the right fertilizer depends on the herb—leafy herbs like basil need nitrogen-rich feeding, while Mediterranean herbs like oregano and thyme thrive with lighter, phosphorus-based fertilization. Below is a more detailed breakdown for individual herbs.
Fertilizing Leafy Herbs: Basil, Parsley, Chervil, Chives
Leafy herbs benefit from regular nitrogen feeding. Fish emulsion or 10-10-10 liquid fertilizer are good choices for leafy herbs.
✔ Basil – Use fish emulsion or 3-1-2 liquid fertilizer every 2 weeks to promote lush foliage. Supplement with compost tea monthly.
✔ Parsley – Apply balanced 10-10-10 liquid fertilizer every 3–4 weeks for steady growth. Add worm castings for slow-release nutrients.
✔ Chervil – Feed lightly with seaweed extract or compost tea every 4 weeks, as chervil prefers gentler nutrition.
✔ Chives – Apply seaweed extract or diluted fish emulsion every 3–4 weeks to encourage strong, upright growth. Avoid excessive nitrogen to prevent overly soft leaves.
✔ Stevia – Use balanced organic liquid fertilizer every 3 weeks, but avoid excessive nitrogen to prevent overly fast growth with reduced sweetness. Kelp extract supports strong stems.
Fertilizing Mediterranean Herbs: Thyme, Oregano, Rosemary, Marjoram, Sage
Mediterranean herbs are woodier herbs that need less fertilizer than leafy herbs with lower nitrogen levels. Excess leafy growth from high nitrogen fertilizers can dilute the flavor of herbs and make them leggy. These herbs do better with gentler seaweed extract, compost tea, and diluted fish emulsion.
The amount you need will depend on how big your planter is, so follow directions on the package. With or without soil additives, liquid fertilizer should be applied more frequently, up to every two weeks. However, use diluted fertilizer if using every two weeks.
✔ Thyme – Use seaweed extract or diluted fish emulsion every 5–6 weeks to prevent excessive leafy growth. Bone meal helps strengthen roots.
✔ Oregano and Marjoram – Apply seaweed extract or compost tea every 3–4 weeks to maintain strong flavor and resilience. Avoid excessive nitrogen feeding.
✔ Sage – Feed lightly with kelp extract or worm castings every 6 weeks for sturdy growth while keeping soil well-draining.
✔ Rosemary – Use seaweed extract or compost tea every 4–6 weeks, with occasional bone meal for root support.
✔ Tarragon – Apply compost tea or diluted fish emulsion every 5–6 weeks, as it prefers minimal fertilization. Avoid high-nitrogen fertilizers to maintain flavor intensity.
Fertilizing Fast-Growing Herbs (Need More Frequent Feeding)
✔ Dill – Apply fish emulsion or seaweed extract every 3 weeks, ensuring plenty of phosphorus for upright growth. Add light bone meal to improve root stability.
✔ Mint – Use balanced liquid fertilizer every 3–4 weeks, diluted slightly to prevent excessive growth. Worm castings help maintain steady nutrients without overfeeding.
Maintaining Healthy Herbs
So, you’ve spent hours at the local nursery (or online) scoping out the perfect herbs for your situation and finding the perfect planter/pot. You’ve repotted your herbs, found a sunny window or perfect grow light and the perfect place for your garden. Time to get lazy.
The thing is, you absolutely must actually use the herbs. Don’t pinch off the only 5 leaves if the transplant is still small. But once the plant gets growing, regular pinching off of leaves is necessary to encourage more leaves to grow. I like to pinch off the entire tip of basil stems (about 4 leaves) because the plant will respond by branching out sideways and growing double the number of leaves I removed.
So, trim those herbs to encourage busy growth, which means more herbs for you.
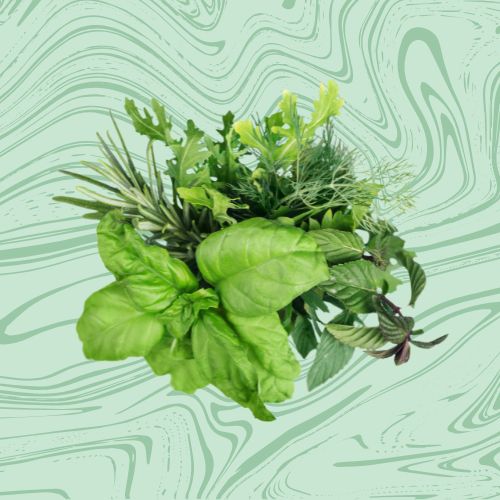
Growing Microgreens Herbs
Another way to grow herbs successfully is to grow microgreens herbs, or micro herbs. I love micro cilantro, micro basil, micro onion and micro chervil. For microgreens, you always start with seeds. Micro herbs take between two to four weeks to grow from seed to full size (microgreens). Planting a tray of micro herbs each week ensures a continuous harvest.
Micro herbs take between 2-4 weeks to grow. Once you harvest they do not grow back, so it is important to take 10 minutes to plant a new tray every week. Micro herbs taste similar to mature herbs. They can be swapped for mature herbs in most recipes where herbs are used for flavor. In recipes that call for full cups or full bunches of herbs, such as pesto, it is best to use regular mature herbs.
Microgreens 101: Learn All About Basil Microgreens.
Troubleshooting Indoor Herb Issues
If you dive into growing plants, indoors or out, at some point something will go wrong. It is disappointing when a plant struggles or even dies, especially after spending good money on planters, soil, fertilizers and plants. There is simply no way to avoiding it, even if you do everything right, things can happen.
Problem #1: Gnats
Overwatering can lead to little gnats. Gnats take up residence in that soggy soil and reproduce with abandon. If you catch the problem early, stop watering and let that top inch of the soil dry out. Also get some sticky gnat traps. You may be able to take care of the problem if you act fast as soon as you see a gnat. Or put a few sticker traps in the herbs as a preventive measure to easily monitor any gnat issues. They are not very pretty, but neither are gnats. The yellow color attracts the gnats.
Buy these cheap sticky gnat traps.
Problem #2: Leaves Look Wilted or Droopy
Droopy leaves are usually related to insufficient water. Lift up the entire pot, does it weigh less than it should? Sometimes, you might think you are watering enough, but the water is not absorbing and only the surface soil is damp, leaving the roots dry. IF your plant can be easily (and gently) lifted from the pot, do so and examine the soil. If the soil at the bottom of the plant is dry, you have discovered the problem. The solution depends on the type of pot your herbs are in.
If the pot has a hole in the bottom, try bottom watering. Find a bowl larger than the pot and fill it with a couple of inches of water (the pot hole must be in contact with the water). Place the entire plant in the bowl with the water. Let the pot soak up the water for at least an hour or several hours. After an hour, you might see that all the water has been absorbed. If your plant still feels dry, add another inch of water to the bowl and let the plant soak for longer. You may see your plant perk up in a few hours.
For self-watering pots and pots with no holes, you might not be watering enough. Examine the plant to see if it appears dry. If it does, increase your watering.
If water does not appear to be the problem, it could be related to heat. Sometimes, plants look droopy if they are stressed out by excessive heat. Place your plant in a cooler location.
Lastly, you may be watering too much. If your soil is drenched, the roots might be drowning. Allow your plant to drain, if possible, and reduce the amount you water.