How to Grow Kale Microgreens
If you’ve been following my microgreen farm journey, you know I’m a fan of small-scale growing. This guide shows you how to grow kale microgreens in personal-sized containers you probably already have, using minimal space and time. Grow your own nutrient-packed microgreens all year round!
This guide will cover everything from the essentials like coco coir, kale seeds, the mister I use and love, and growing containers. With just a few minutes of daily care, you’ll be harvesting your own delicious microgreens in no time.

Why Should You Trust My At-Home Kale Microgreens Growing Method?
I’m a seasoned (former) microgreen farmer with over seven years of experience. I believed in the “living tray” method of selling microgreens; most of the microgreens I sold came in 8oz round deli trays and still living, so the eater could harvest their own microgreens right before consuming. That means I grew thousands of small, personal-sized microgreen trays. All my experience is synthesized in this guide to help individuals grow their own microgreens.
This guide isn’t about industrial-scale production; it’s designed for home cooks seeking fresh, flavorful microgreens for personal consumption. Discover the diverse varieties I’ve successfully grown and sold for years and learn the exact methods I used to provide my farmer’s market customers with the highest-quality microgreens.
What Are Kale Microgreens?
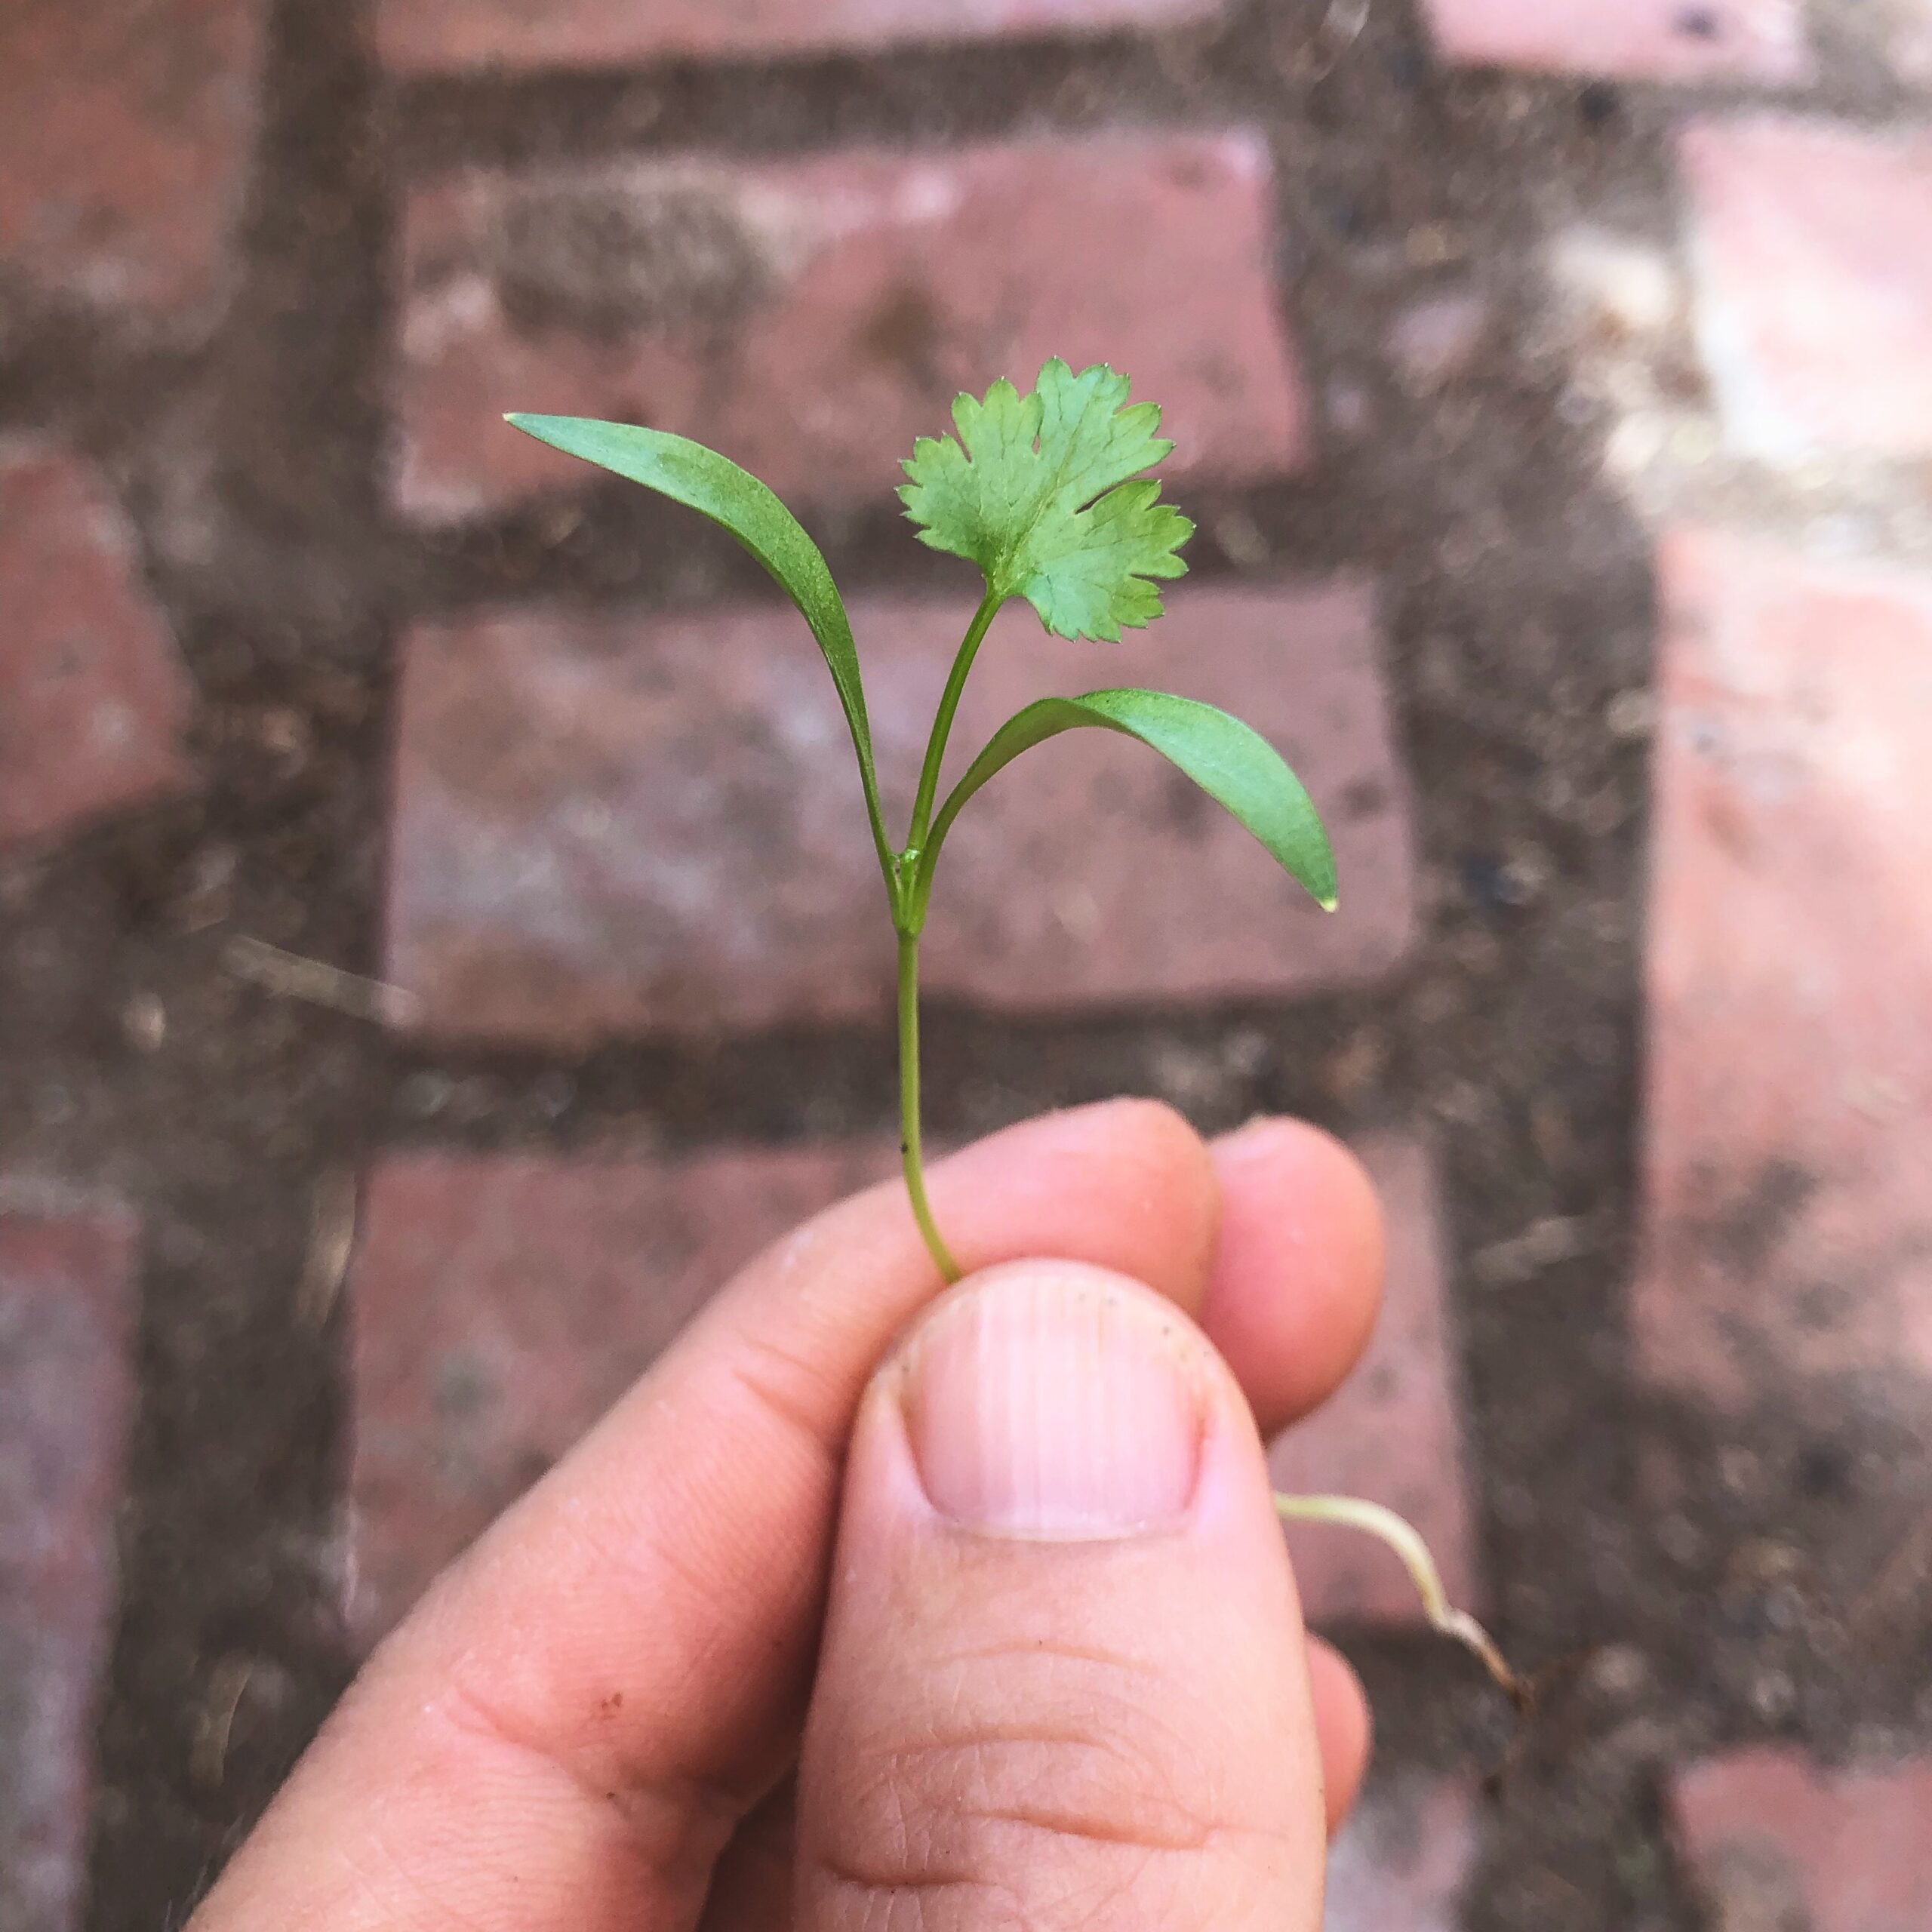
Microgreens are edible immature plants with loads of flavor and packed with nutrients. Kale Microgreens are very young and immature kale plants. Think of a kale seed–the same kind of seed you might use to grow regular kale, but only after a couple of weeks of growing.
How Long Does It Take To Grow Kale Microgreens?
If the weather is warm (70- 100 degrees) your Kale Microgreens should be ready in about 8 days. If the weather is cold (55-65ish degrees) closer to two weeks. If the weather is even colder, you’ll need to grow them indoors and use a grow light (one if using lights and a heated mat, or two weeks if just using a grow light).
What Is the Difficulty Level for Growing Kale?
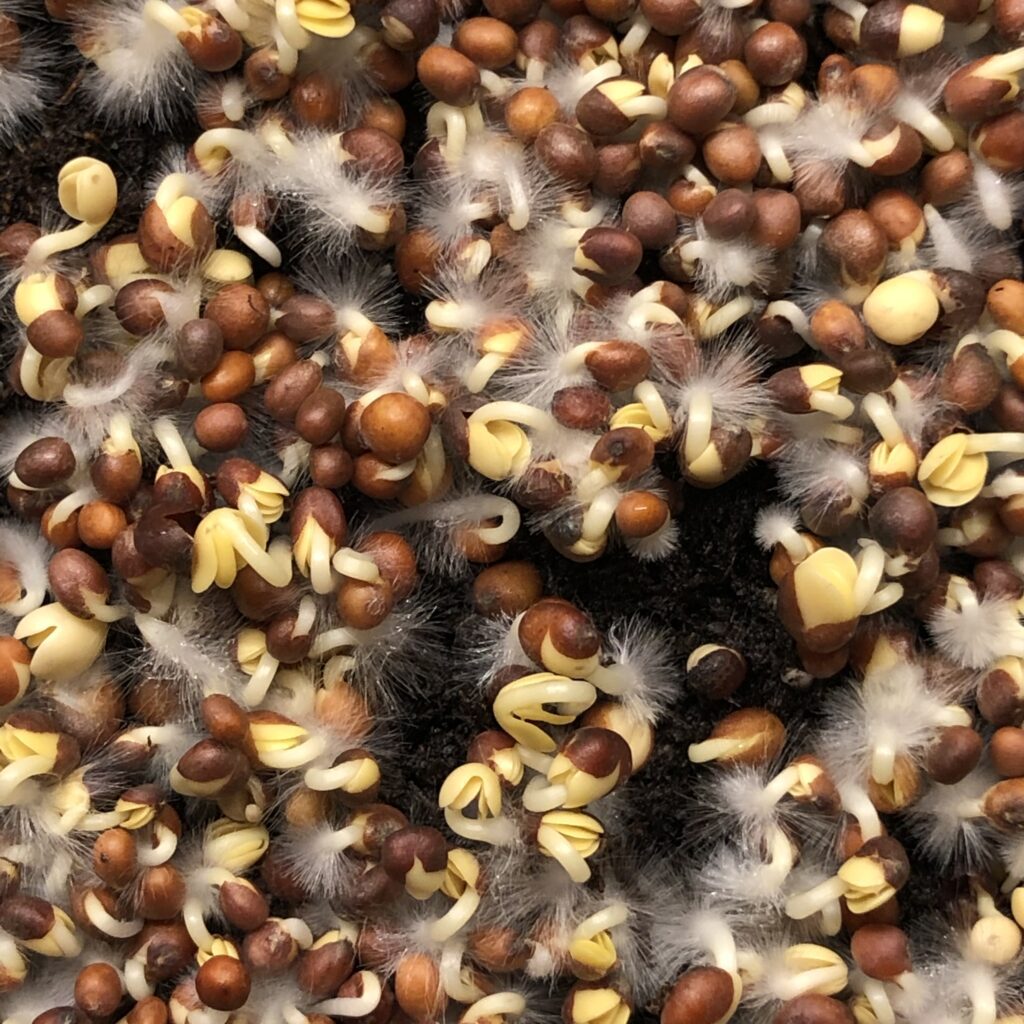
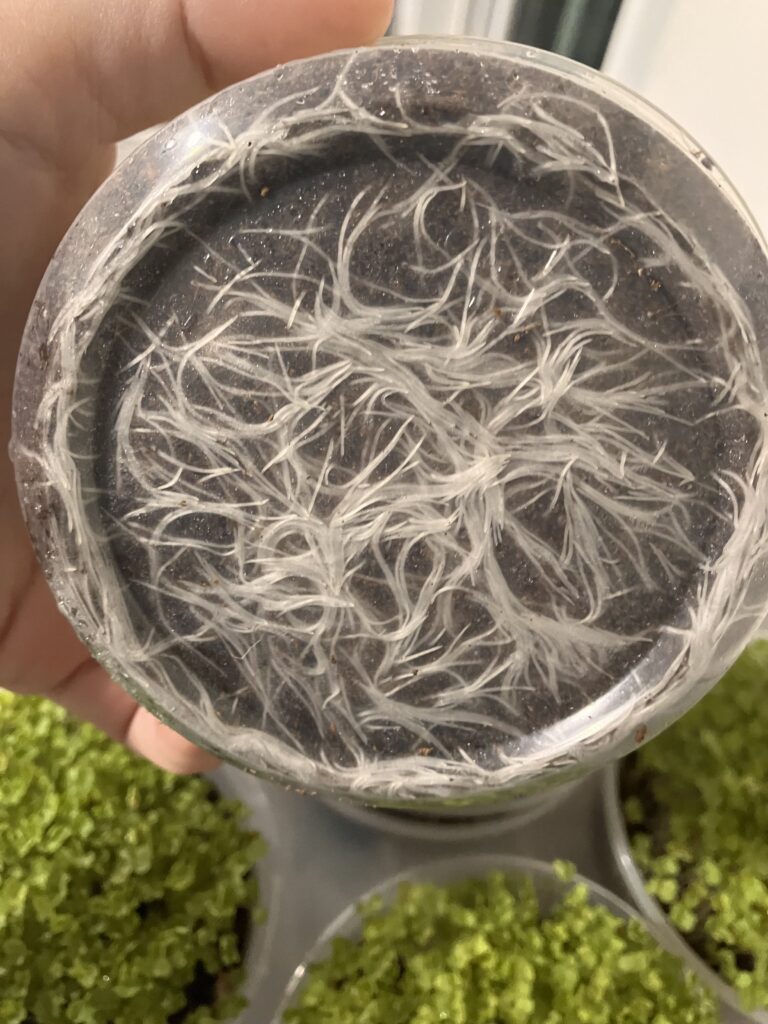
Easy. Micro kale, a very popular choice for beginners, offers a quick and rewarding harvest. However, like all microgreens, they can be susceptible to mold and funk. This is a common challenge even for experienced growers. Should you encounter mold, don’t stress out. Yes, you will have to start over, usually a microgreen tray will not thrive with funky mold. Before you trash the entire tray, ensure the funky white stuff on your grow isn’t just root hairs.
Root hairs are completely normal and can look like mold
Read more about how to determine if the funky white stuff in your microgreens tray is mold or root hair. With a few adjustments to your growing environment, you’ll be enjoying fresh micro kale in no time.
Gather Your Kale Microgreens Growing Supplies
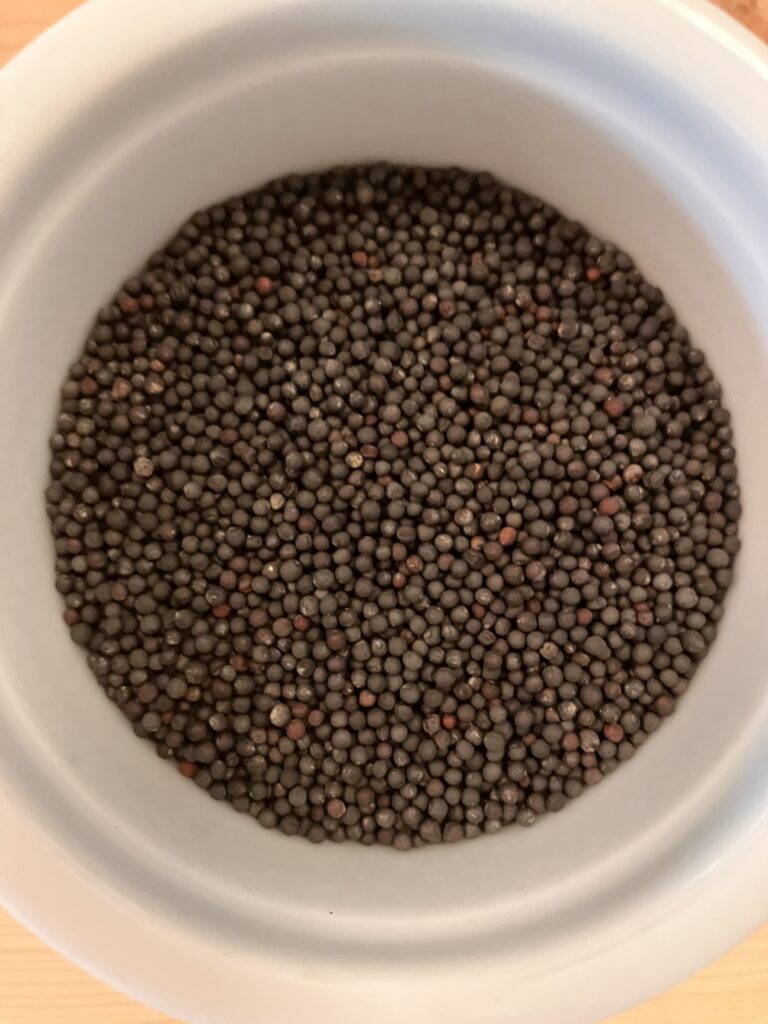
1. Microgreens Seeds
To minimize the risk of foodborne illness, always purchase kale microgreen seeds or sprouting seeds from a reputable seed supplier that guarantees their suitability for microgreen production. Refer to my previous post for a detailed explanation of the difference between Sprouts and Microgreens.
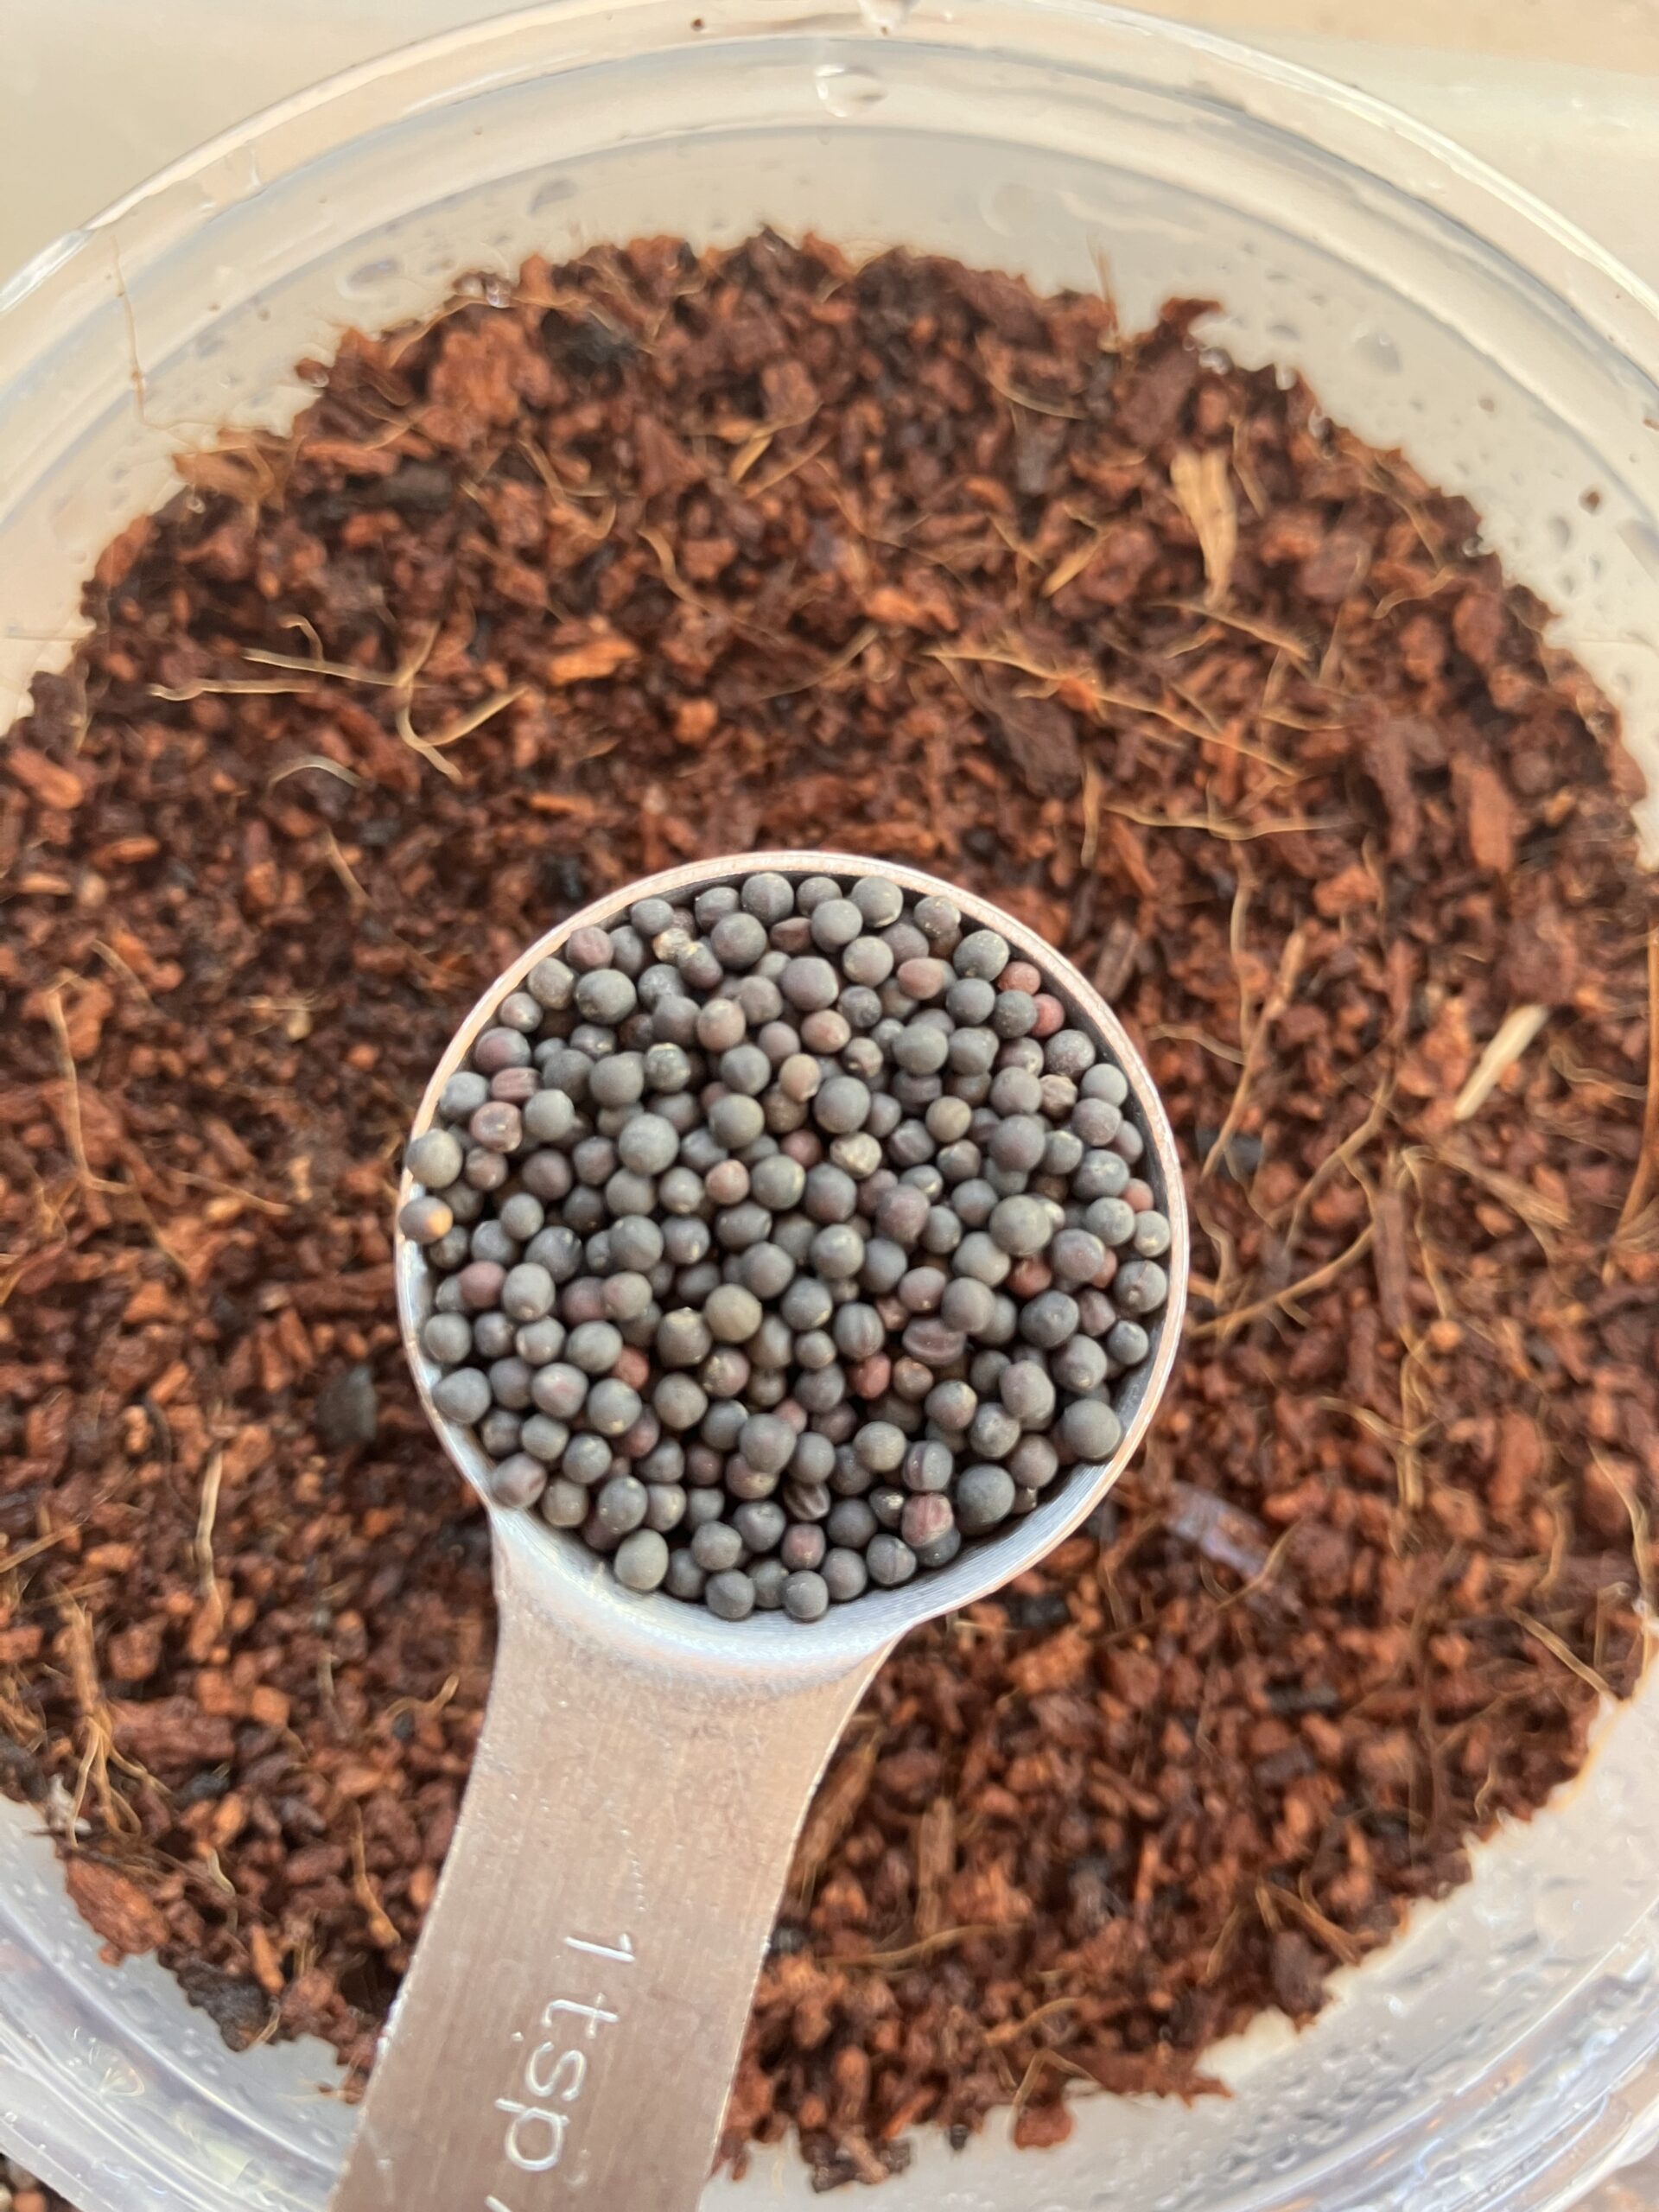
For a small 8-ounce deli tray, approximately 1 teaspoon of seeds is ideal. I’ve personally had positive experiences with this Red Russian kale seed and these seeds. I’ve also grown this mix of two different kale varieties in one mix (you might notice that these seeds are labeled as “sprouts” seeds and not microgreens seeds. No problem. Sprouting and microgreens seeds can be used interchangeably). Another kale varieties mix of seeds.
Picking a Kale Microgreens Variety
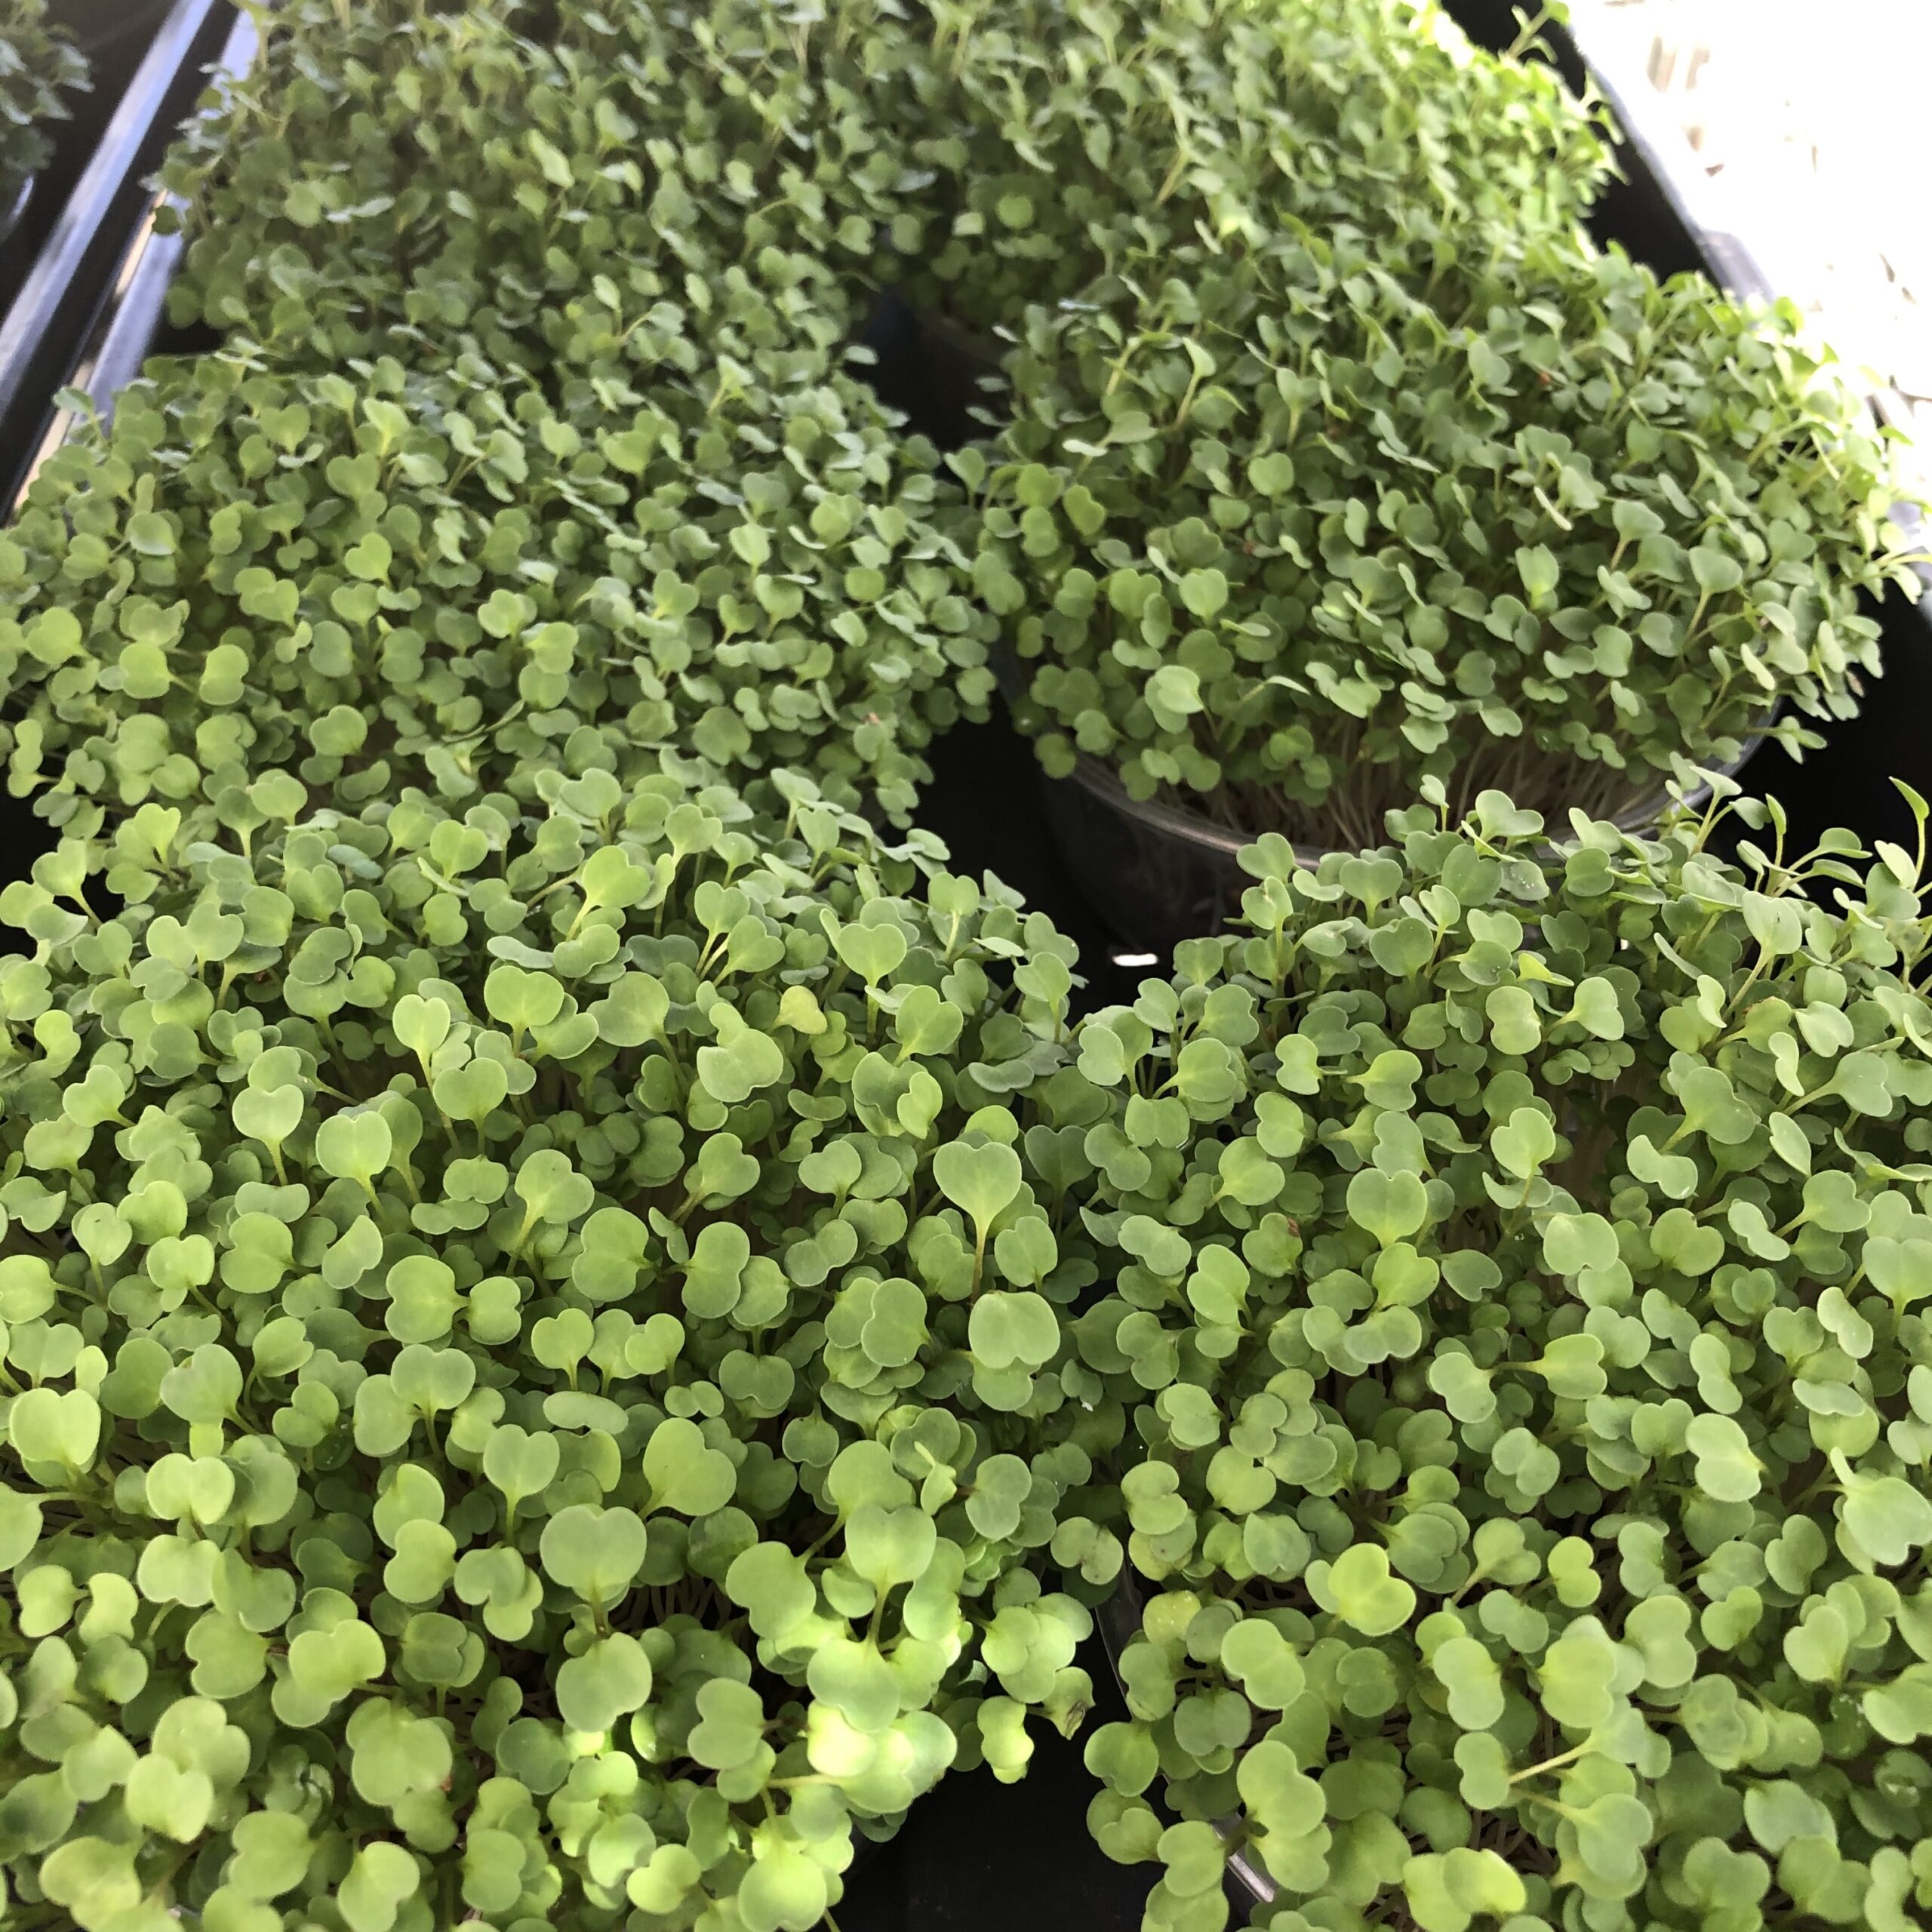
Kale is such a great microgreen because it is easy to grow and there are so many varieties to choose from. From reddish varieties to dark green to light green, with leaf shapes from flat and roundish to frilly. I prefer growing microgreens to just the two-leaf stage. I find the microgreens have stronger flavor and more tender leaves at the two-leaf stage. May people grow microgreens a bit longer, until the third leaf (the “true leaf”) emerges. It is the third leaf that reveals the fun leaf shapes and more vibrant colors.
The chef-types loved the microgreens at the true leaf stage because of the interesting shapes and colors. However, the visual improvement comes at the expense of tenderness and flavor.
No matter what variety you choose, they are all easy to grow and generally can be combined to kale variety mixes. Kale varieties have similar water and lighting needs, and grow at a similar rate, making them great candidates for combining into microgreen mixes.
Keep in mind, contaminated seeds can lead to illness outbreaks, especially in sprouts. By choosing reputable seed vendors and following safe growing practices, you can ensure the safety and quality of your microgreen harvest. Always look for seed companies that advertise “microgreens” or “sprouting” seeds. Also, look for companies that test their seeds for contaminants.
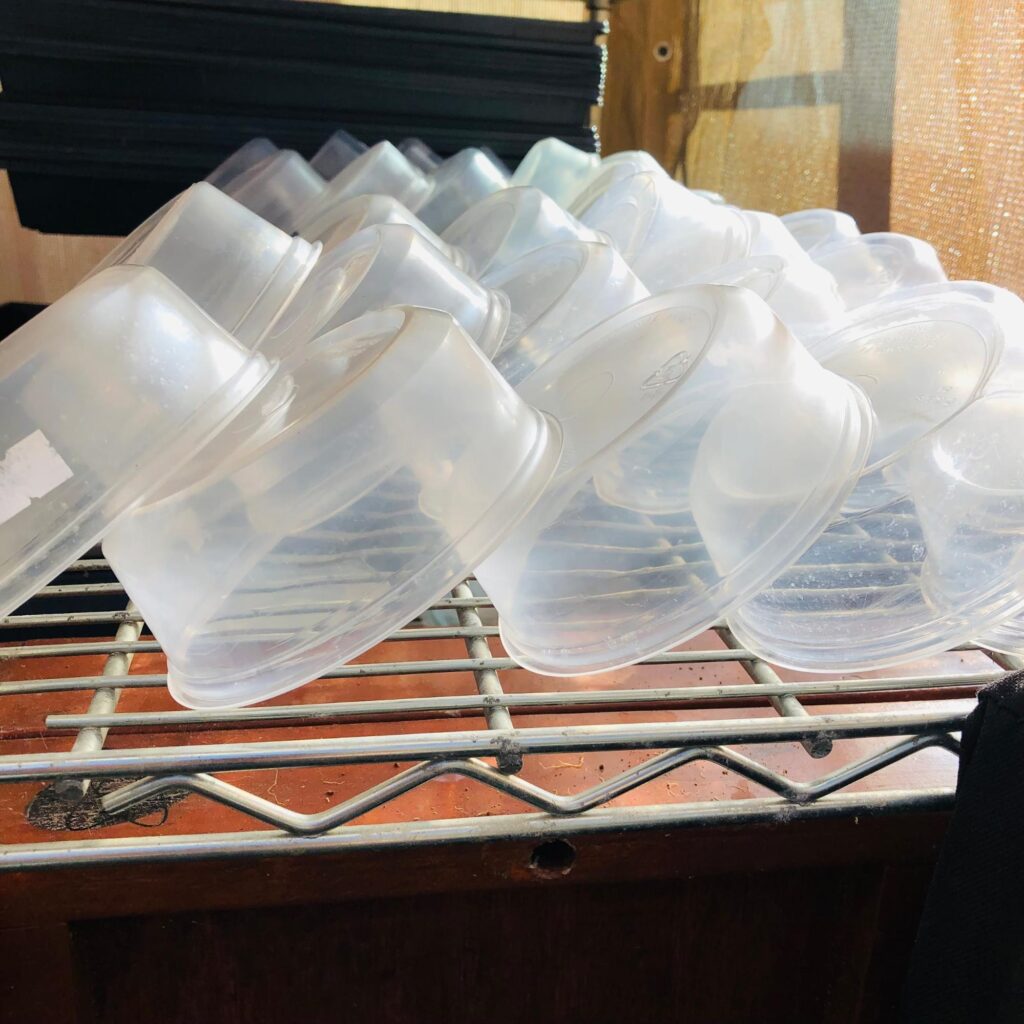
2. Growing Trays
For home growing, I recommend using transparent 8-ounce round deli containers. The visibility allows for easy monitoring of root health and growth progress. The 8-ounce size is convenient for individual consumption and allows you to experiment with various microgreen varieties, each in its own container. These trays are easy to clean and dishwasher-safe, ensuring long-term use. The round shape promotes even airflow, minimizing the risk of mold and ensuring a healthy crop.
You can buy 8-ounce deli trays in bulk on Amazon which are great if you will be growing many varieties at once, or you are growing microgreens with a group of people (or doing a classroom hands-on growing lesson).
Can I Repurpose a Used Container? Does it Have to Be 8oz?
You can repurpose a food container, like a dip or hummus container. You may have to adjust the amount of growing medium and seeds.
They don’t exactly need to be 8-ounce or round for that matter. But, 8-ounce is a very good size for individual consumption. It allows you to grow multiple varieties at once, each in its own tray. They are easily washable and fit in a standard dishwasher and they are readily available. Also, the round tray allows for even air distribution and airflow to minimize crop loss from mold.
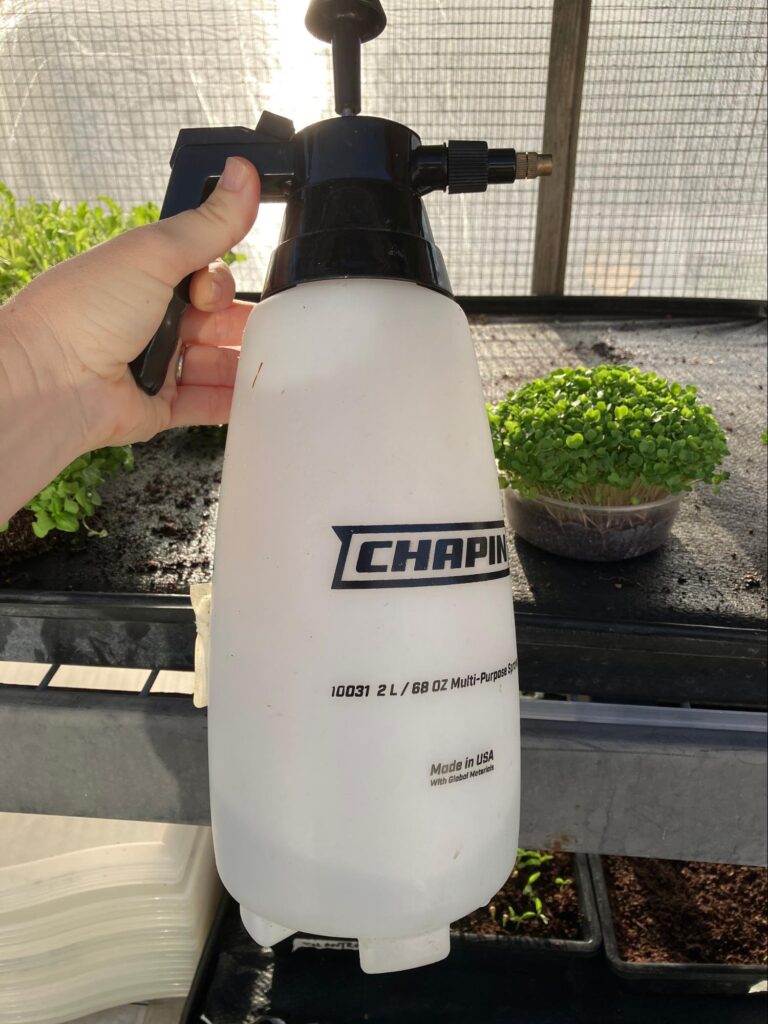
3. Mister
A spray bottle with a fine mister and clean water, the kind you’d drink. If you are going to grow regularly, a pump garden sprayer is convenient. However, a small spray bottle or even the mister nozzle on your garden hose will work in a pinch.
4. Growing Medium (“Soil”)
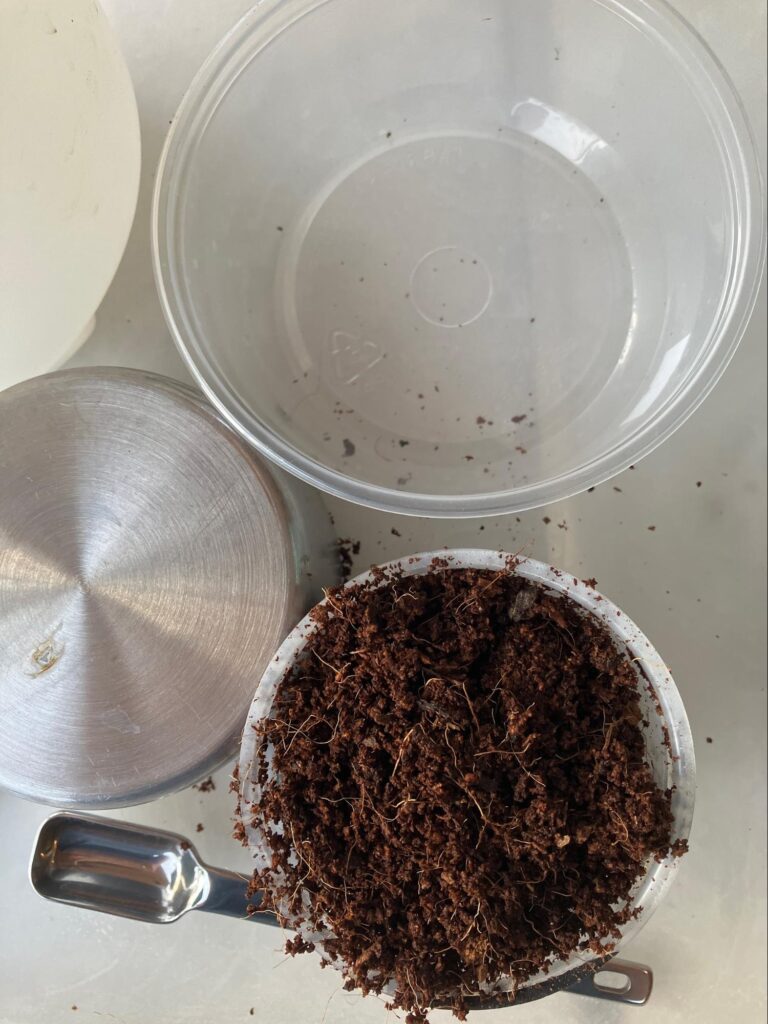
I recommend Coco Coir to grow Kale. Don’t waste your time trying to grow on a paper towel (future post on that). Growing mats are an option too. I don’t prefer growing mats because they can break easily and need more attention with watering (they dry out faster).
Coco Coir can come compressed or already fluffed up. Compressed bricks are much easier to store and are more economical to purchase online. The most cost-effective is the 5kg size here (you can either rehydrate the entire brick, or chip off pieces as you go), or get the smaller compressed brick here, or buy even small pucks here (I use two of the 30 mm pucks per tray).
Read more about why I don’t grow in peat moss here.
A Warning About Growing Medium and Food Safety
There are several companies that sell microgreen-specific growing mediums. Be alert. Any medium used to grow microgreens should absolutely not contain any animal-based manure. That includes earthworm castings and guano. Avoid any growing medium or microgreen soil that contains any animal by-products. If the soil says it has compost– that too may contain animal by-products.
Why? Animal manure is known to contain various pathogens like e-coli and salmonella, which can make you sick. Because microgreens are consumed shortly after planting, it is very possible your microgreens can become contaminated too.
5. Topper
After sowing, your tray of microgreens will need a cover until they grow a stem. The cover minimizes evaporation, keeps the seeds from drying out, and provides a darker environment.
You have two options: a small piece of cardboard or box to place on top of your tray, or a second tray placed directly on top of your seeds. With the cardboard, you will have to spritz your seeds twice a day, with the second tray on top, you can plant and ignore for several days.
6. Sun or Grow Light
If you’ve got a sunny window or a place with indirect sunlight, that is all you need. If it is mid-winter, cold and there is little sun out, you’ll need a grow light or even a desk lamp. Read to the bottom to see my note on growing in colder conditions.
7. Measuring Cup and Teaspoons
You’ll need a ½ cup measuring cup and 1 teaspoon.
8. Water
Microgreens must be grown in potable water (i.e. water that is not contaminated and is safe to drink straight). Use bottled water, or filtered (we like this countertop Berkey filter system and this undersink reverse osmosis filter), and boiled water (if you must.) Avoid distilled water.
How To Grow Kale Microgreens in Soil
Step 1: Prepare and Sanitize
Wash your hands thoroughly. Sanitize all surfaces. Wash all growing supplies (trays, measuring spoons, measuring cups) with hot soapy water and dry. Sanitize next. This is especially important if you are planting and growing in your kitchen. Kitchens tend to have various pathogens lurking about (it’s gross but you definitely do not want to pick up any pathogens and start growing them along with your microgreens)

Step 2: Measure Seeds
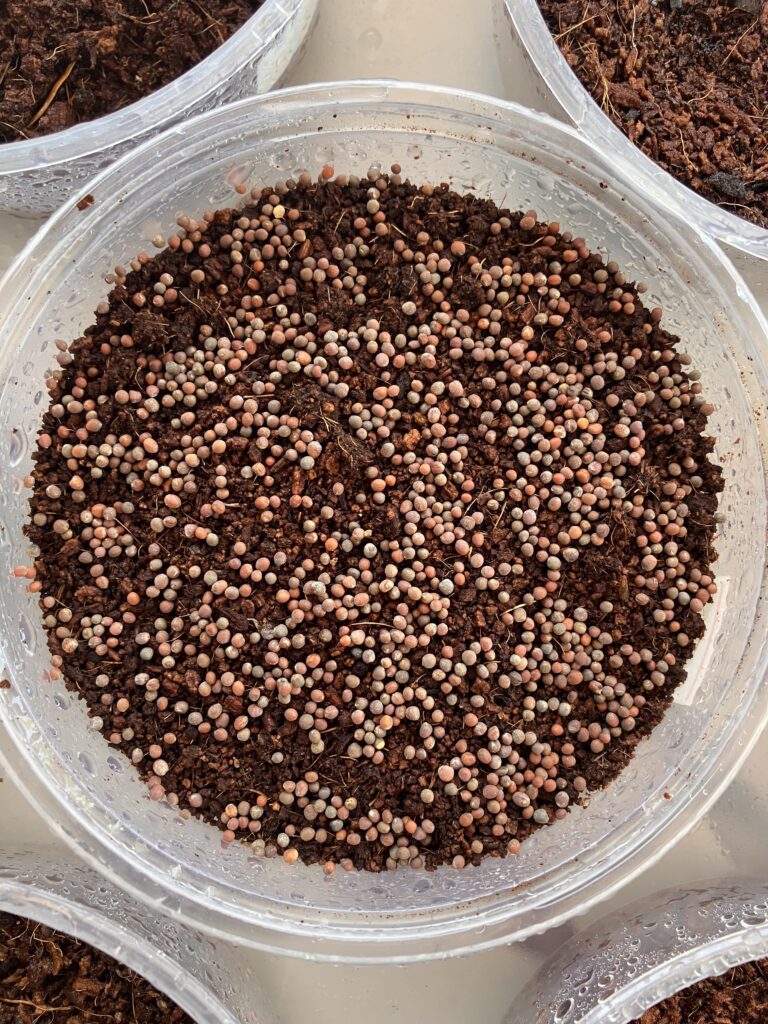
Measure out 1 teaspoon of kale microgreens seeds. *seed measurements based on growing in an 8oz deli-style tub. For bigger trays, adjust the amount of seed to ensure even seed coverage with no seeds on top of one another but most of the soil is covered with seeds.
Kale seeds, like broccoli seeds, are spherical, and can easily roll around.
Step 3: Sanitize Your Seeds
It is best practice to sanitize your microgreens seeds, especially If you or anyone who will eat your microgreens has a weakened immune system. If you buy from a reputable microgreen seed company, are growing in soil (i.e. not sprouting), using potable water, and sanitizing your tools and surfaces, the associated risk is much lower. I have not heard of any illnesses or outbreaks from microgreens, though several larger companies have issued recalls.
It is important to understand that when you grow microgreens at home, you have control over many of the potential sources of contamination. By buying from reputable seed companies, using clean water, using a growing medium without animal-based manures, and using clean tools, you are ensuring your microgreen grow is safe.
Personally, I do not sanitize my kale seeds. I am not growing for any at-risk populations, I buy from reputable seed suppliers, I encourage airflow to my microgreens, I use clean tools, and I don’t use any animal manure, and I avoid growing in my kitchen (where food pathogens are often found). Please, use your own judgment and use caution.
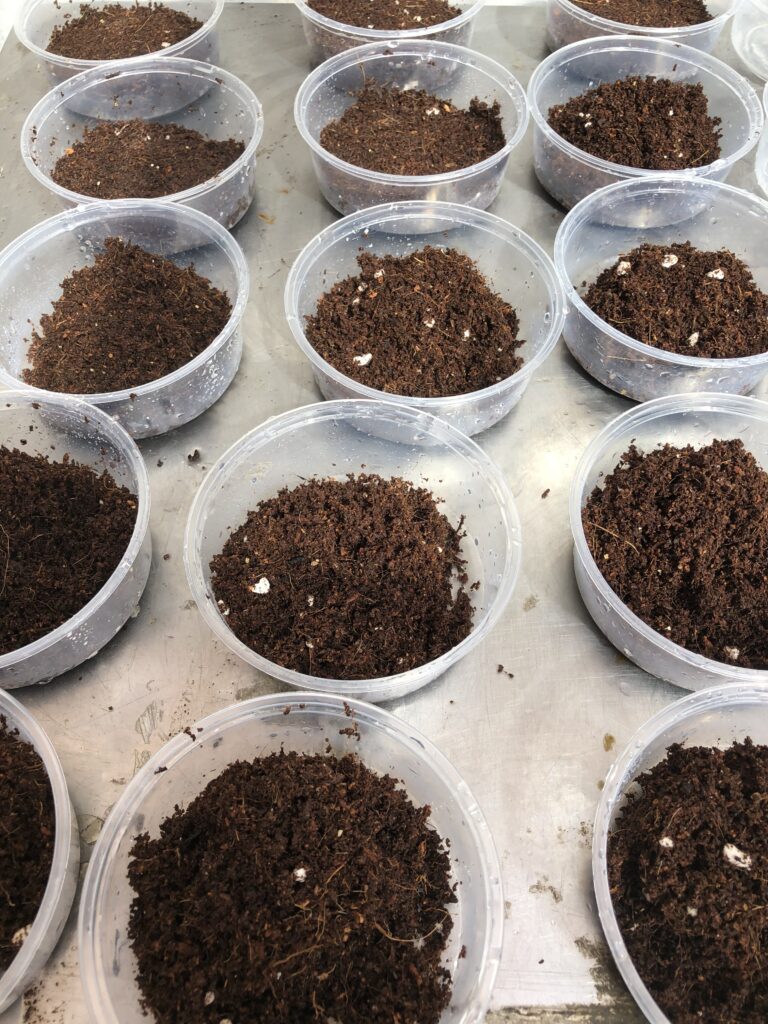
Step 4: Prepare Growing Medium
If you are using compressed coco coir, add water per the package directions to rehydrate. You can also eyeball it. Add some water, stir or massage (or wait for 15-30 minutes for the coco coir to absorb it), and repeat until the coir is moist. It is not possible to give you an exact amount of water because it depends on how much coir you will be rehydrating.
If you overwater your coco coir and have a soupy mess, simply grab a large handful and squeeze until no more water drips out.
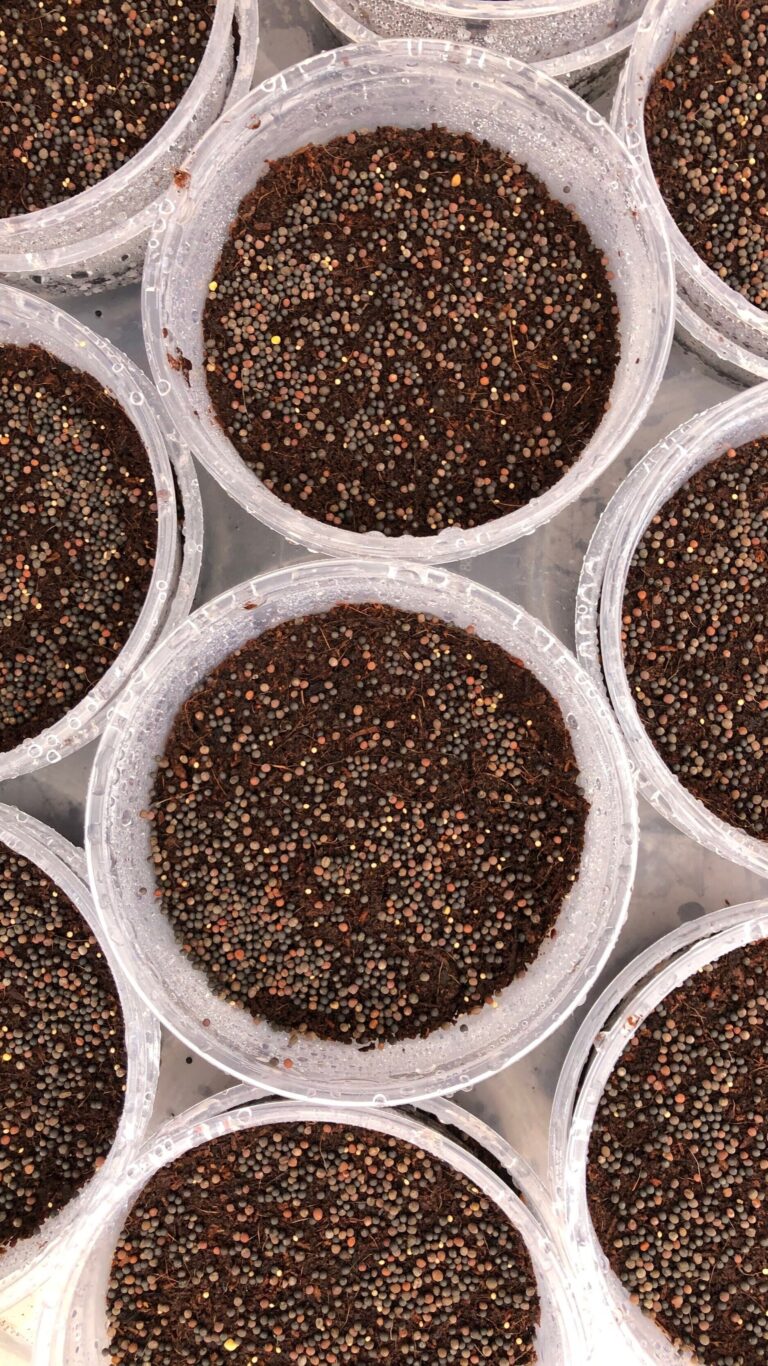
Step 5: Fill Tray
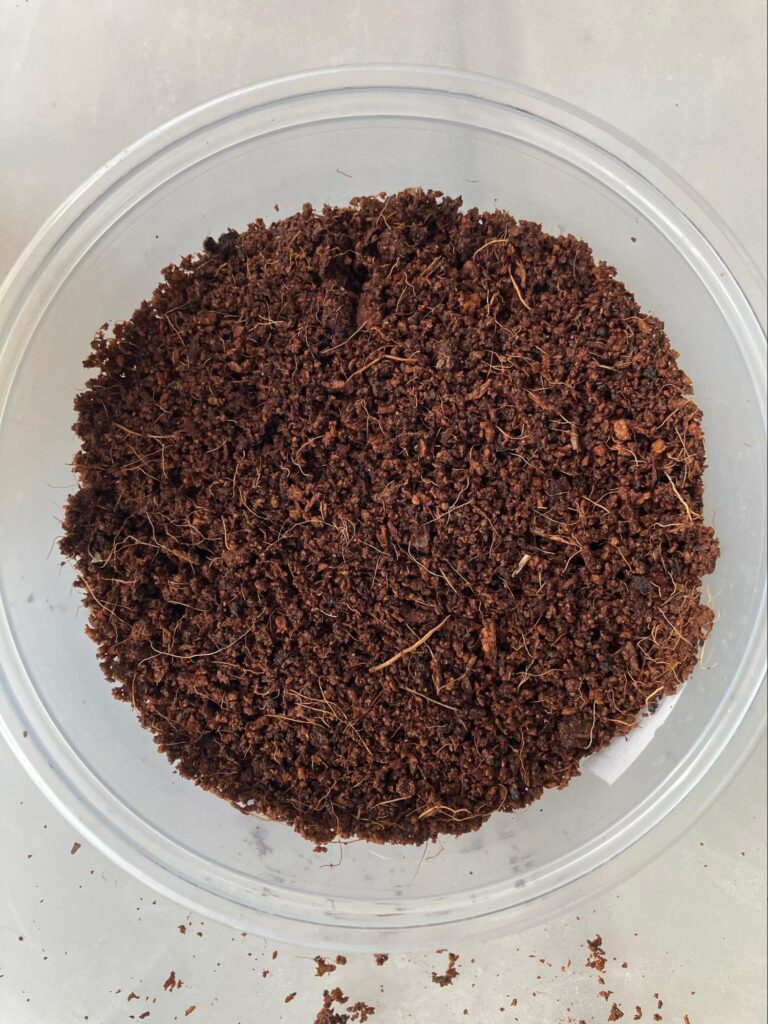
Add at least a ½ cup of moist coco coir to the 8-ounce deli-style tray. If you will be unable to check your growth each day, and you expect warm weather, increase the amount of coco coir to 1 cup. Gently jiggle your tray to even out the soil distribution and use the bottom of the measuring cup to gently (but firmly) compress the soil and create an even surface for seed distribution.
Because kale seeds are round, creating a flat surface is crucial. If you have dips and valleys on the surface of your growing medium/coco coir, the kale seeds will roll into the nooks and crannies. The uneven distribution of seeds can lead to clumping and poor air circulation. Poor air circulation can lead to mold. So, do your best to flatten the top of the growing medium. If your seeds do clump up, use the tips of your (clean) fingers to spread them out before watering.
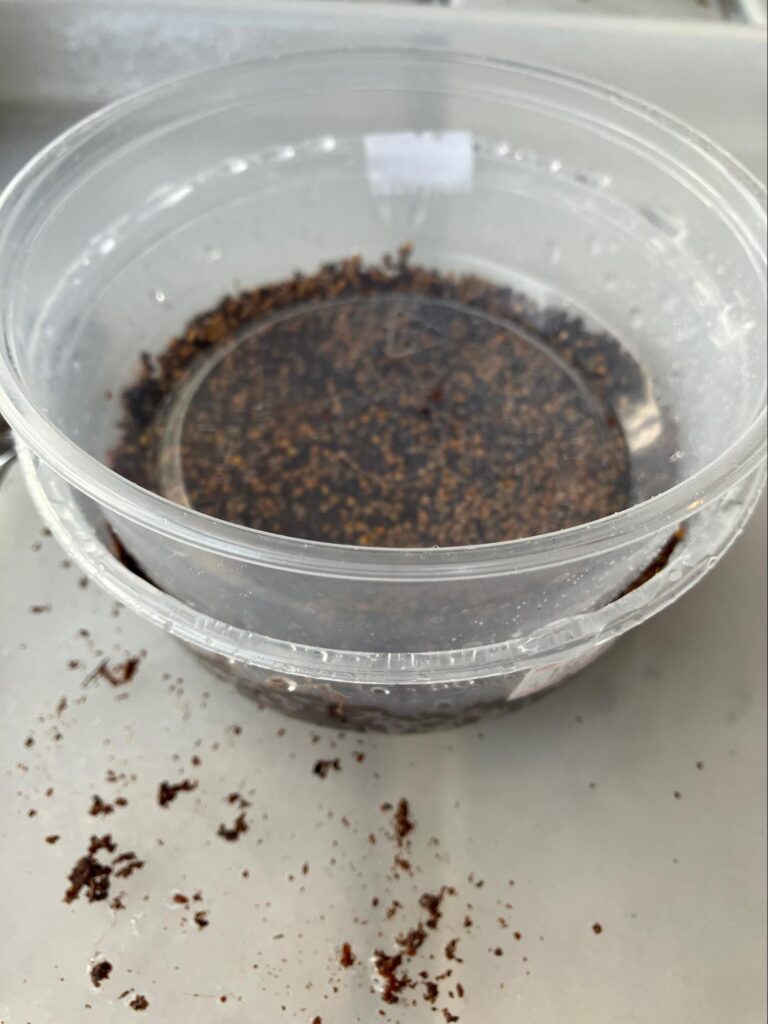
Step 6: Dampen and Sow
Mist your now-even tray of coir with water (just enough that your seeds will stick) and spread seeds evenly over the soil. They should not overlap much but can touch each other. Use the tips of your fingers, the measuring spoon, or broadcast seeds from a very small cup or bowl. This part is not an exact science.
If the seeds get clumped up, use your fingers to spread them out. Lightly mist with water.
Step 7: Cover
Place the second tray directly on top of the seeds (the topper tray). Or, place a thick piece of cardboard over your tray. Place in a warm place (no light is needed at this point).
Step 8: Mist Daily
If your tray is covered by cardboard, check on your tray twice a day. Mist lightly to ensure the seeds and soil stay damp if the seeds are drying. You do not want the seeds to totally dry out.
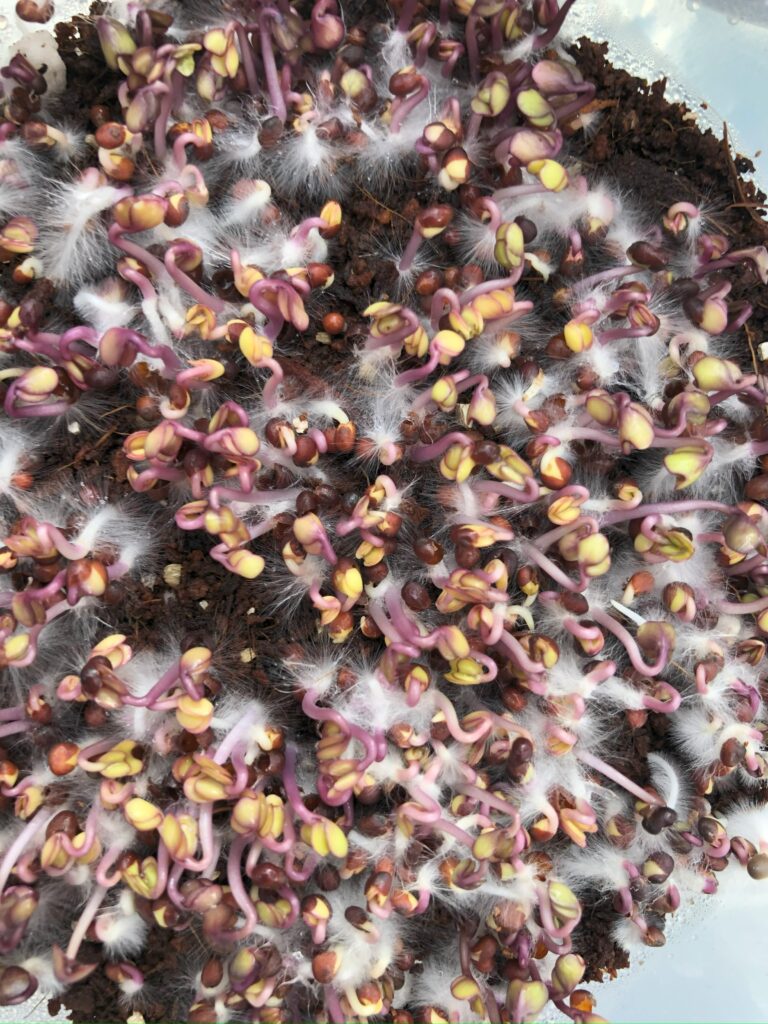
*If your tray is covered by another tray sitting directly atop the seeds, you likely do not have to mist for a couple of days. Feel free to take a look, but avoid lifting the topper tray. Some seeds will stick to the topper tray and their growth will be disrupted. If it is very warm and you notice the soil is drying out, you can trickle water around the edges without lifting the upper tray.
In a few days, you will notice your seeds have begun to grow. If you have a topper tray, you may remove the topper to mist to ensure the tray stays moist. Continue to mist daily (or twice daily if it is warm) until there is ½ inch of growth.
Step 9: Remove Topper, Introduce Light, and Continue Watering
Once the micro kale is about ½ inch tall, remove the topper. In warm weather, kale microgreens grow fast and may need to be uncovered in just 3 days. The microgreens will look yellowish from lack of sun. From now on, you will water by pouring rather than misting. Basically, if you continue to mist, the greens will get wet, but the growing medium will not get fully watered. To ensure the soil gets adequate water, pour water along the edges of the tray to avoid damaging the microgreens but to get the water down to the soil where it is needed.
Move the tray to a place with bright light and airflow. This can be a sunny window, a patio, or under a lamp. While direct sunlight is not bad for your microgreens, it will dry out your tray much faster. You will need to check on the tray frequently to ensure it doesn’t dry out. Again, your soil must be moist, not wet. It is tempting to water more in hot weather or in direct sunlight, but overwatering is still an issue. You will need to water more often rather than using more water. Expect to check your microgreens at least three times a day if growing outdoors in very warm weather. (or just grow indoors).
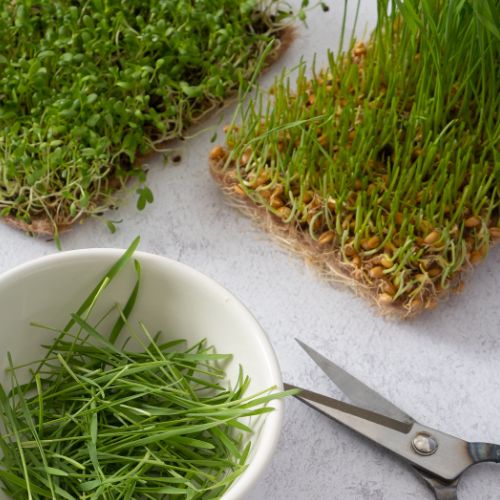
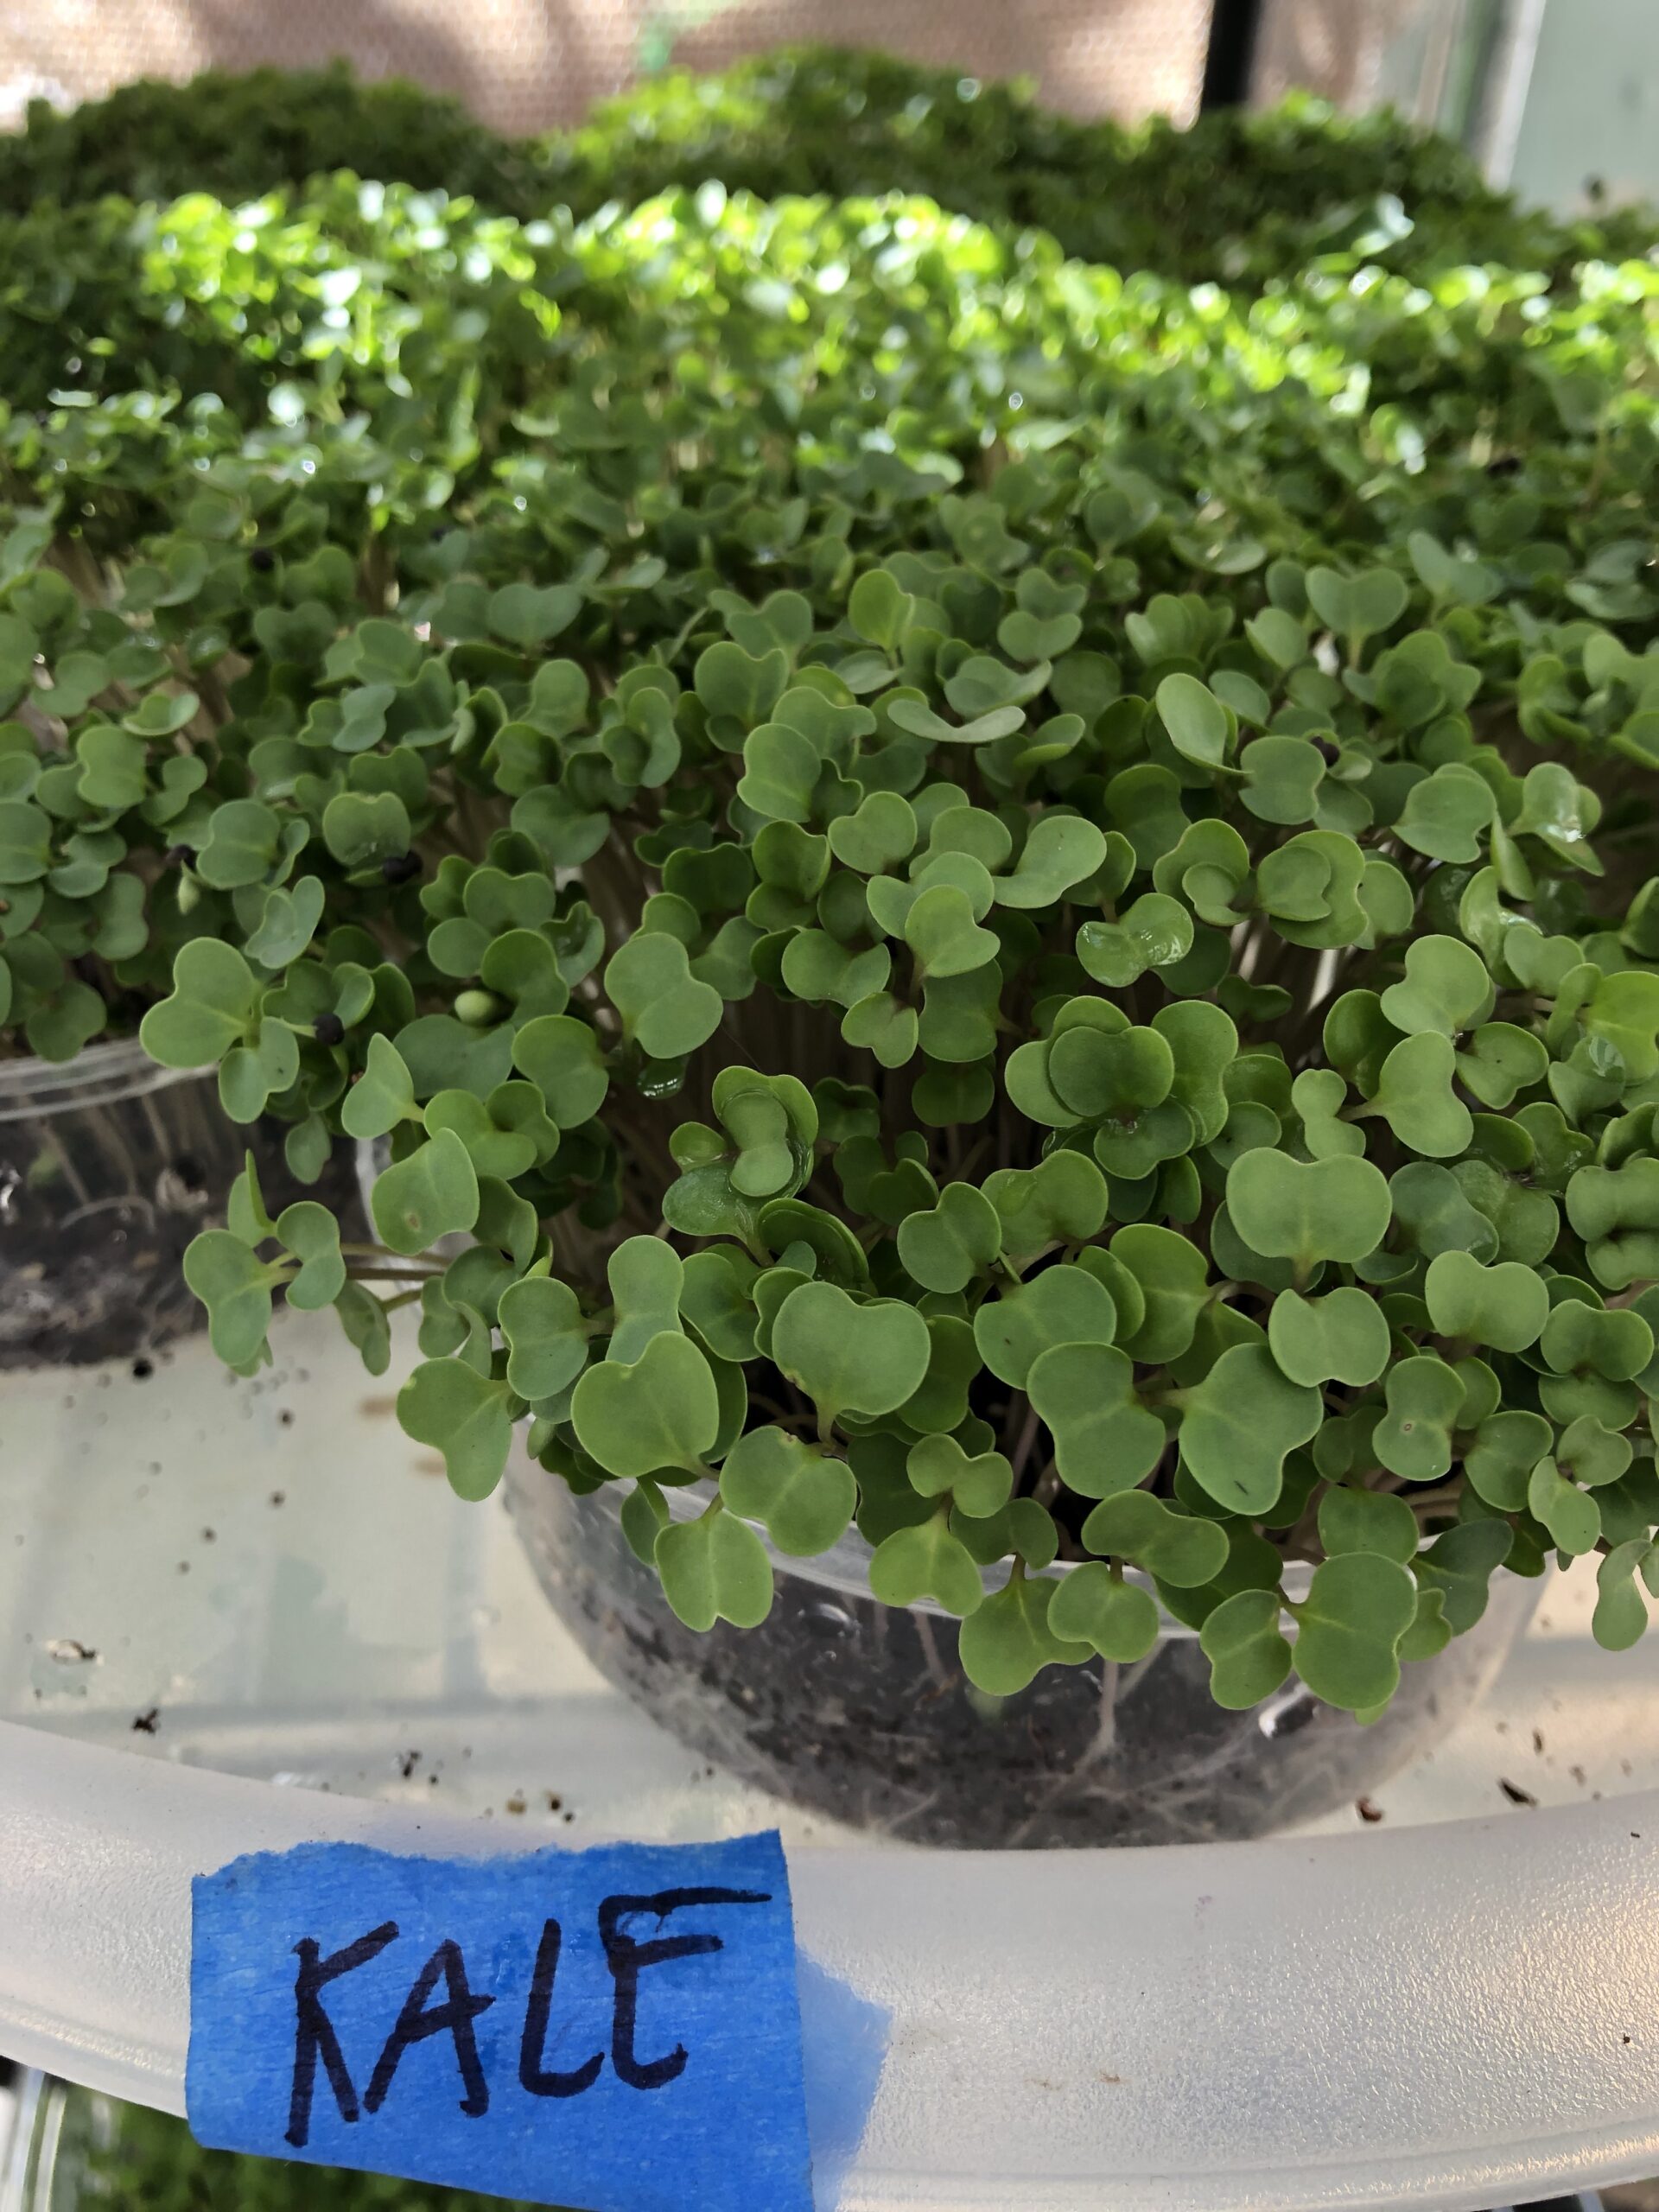
Step 10: Harvest
When the Kale Microgreens are at least two inches tall, (tall enough to easily cut with a knife or scissors) they are ready to harvest. If they are outdoors, bring them indoors. There is no more need for a bright window.
Harvest as much as you want to eat at a time, you do not need to harvest the whole tray all at once. Continue to water to keep the soil moist. The microgreens should remain fresh for at least a week. (if you want to keep them in a bright window, they will continue to grow quickly. You will need to eat them faster).
After you have cut all your microgreens, discard the soil and start over. Your microgreens will not re-grow. If you see white fuzz growing on your microgreens, that fuzz might be root hairs (totally normal). Read my post about white stuff growing on microgreens here.
A Note About Glass And Growing Microgreens
I do not use glass or Pyrex to grow microgreens. Glass is no doubt “cleaner” than growing in plastic, but when you farm for others, glass is a major no-no. Glass shattering in someone’s food supply is very bad. Glass is not allowed anywhere in commercial farming–not even glass light bulbs. Seriously, the Food Safety Modernization Act (FSMA) does not allow it.
Obviously, when you are growing for your own consumption, the fear of errant glass ending up in the food supply is not a big concern. But, keep in mind that water is involved in growing microgreens. You will also be inspecting your grow, lifting, spraying, and moving them around. Consider whether glass is the best option for you.
A Note About Overwatering
It is very possible to overwater your microgreens and drown them. The goal is for moist soil, not waterlogged. If you overwater at the early stages, remove all toppers to try to dry them out before any damage is done. If you overwater at the later stages, try gently tipping your tray on its side and allowing the excess water to drain out. You can gently squeeze the tray to encourage more water to drain out.
If it is not possible to tip or dry out the tray, you can always try to poke a few holes in the bottom of the tray to drain out the excess water.
Growing in Colder Conditions
If you are growing during the cooler months (under 60F/15.5C degrees) and your grow zone (where you grow your microgreens) temperatures are below 60 degrees, a seed heating mat will be helpful.
You can grow kale without a seed heating mat, but they will take longer to grow. During the extra growing time, your crop is more at risk of mold. A seed heating mat like this one will speed up your grow.
Other Microgreens Varieties
Microgreens 101: Learn All About Basil Microgreens
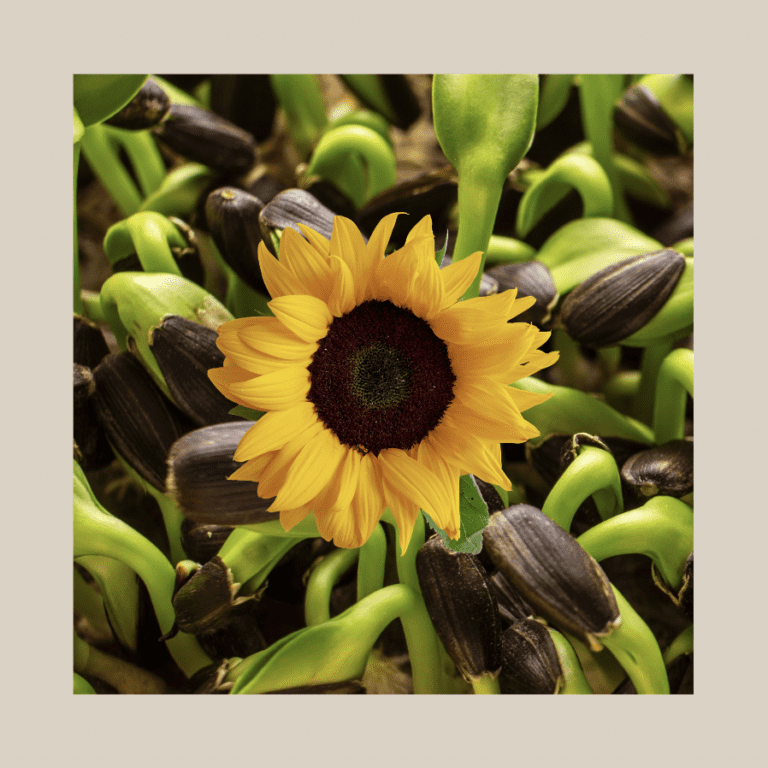
Learn All About Sunflower Shoots—Yes, They Are Microgreens!
All About Mustard Microgreens (Intense Mustardy Flavor)
All Your Questions Answered About Radish Microgreens
Why We Should All Eat Broccoli Microgreens
Learn All About Arugula Microgreens
Microgreens Care
3 Ways to Wash Microgreens And Avoid Mushy Microgreens
Growing Microgreens: Should You Grow Them in Your Garden?
White Fuzz on Microgreens: Is It Microgreens Mold?
Growing Microgreens: Should You Grow Them in Your Garden?
Microgreens Care: 2 Reasons You Have Gnats In Your Microgreens